This blog post contains affiliate links. When you shop through my links, I will receive compensation at no cost to you. Thank you from the bottom of my crafty heart!
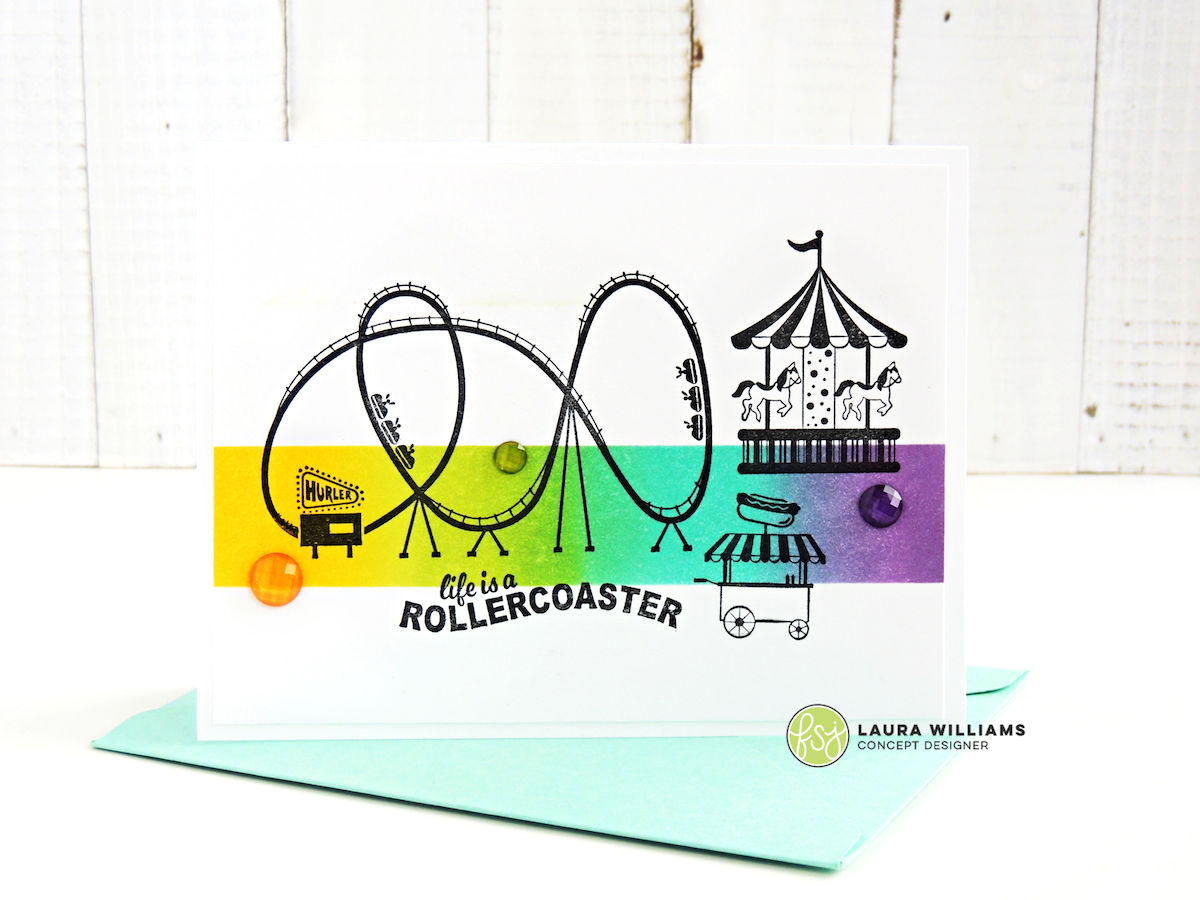
Let's first talk about the inky goodness happening on today's cards. I love the crisp and clean look of these cards - the ombre colors, simple embellishments and bold black stamped images make these simple cards look anything but boring.
Let's first talk about the inky goodness happening on today's cards. I love the crisp and clean look of these cards - the ombre colors, simple embellishments and bold black stamped images make these simple cards look anything but boring.
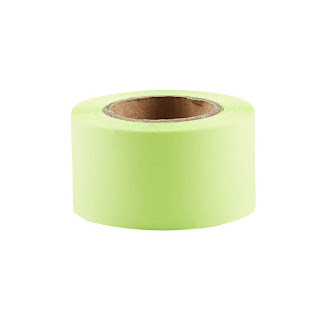
My favorite supply to help me with this inky ombre background is FSJ's Electric Sticky Tape. It comes on a roll like washi, but it's mostly like a sticky note - imagine you cut off just the STICKY part of a Post-It Note and used it as tape. The texture of the tape is like paper and the sticky is less sticky than washi (meaning, it won't tear your paper when you pull it up.)
 |
| FSJ Electric Sticky Tape |
You don't SEE the Electric Tape on this card, but it's an important part! TIP: If you don't have Electric Sticky Tape, you could use a not-too-sticky washi tape, or just take some of the stickiness off by putting your fingers all over it first.
Here's how to create this background:
- First, attach two strips of Electric Tape (or unstickied washi tape) across card base, leaving space in between. That space will be your inky stripe. TIP: The Electric Tape is a bit wider than regular washi. If you use washi, you may want to use two lengths of washi for each length of Electric Tape, to give yourself a wider covered area.
- Next, use a sponge dauber and your choices of ink. Begin blending ink over the open area between the tape. Pay attention to the taped area, so that you don't go above or below the tape. This technique works with one color of ink, or many - get creative! (I used FSJ's inks in Lavender Fusion, Cool Pool, Lemongrass, and Summer Days)
- Last, remove the tape and see the magic you've created! Then, add stamped images and sentiment on top.
How can you make this idea your very own? Think about these ideas to change it up:
- Vary the width of the inky stripe.
- What about a diagonal strip across the card?
- What about a stripe that goes from narrow to wide or vice versa?
- RAINBOW STRIPE!
Now, let's talk about HAPPY PLACE!
Happy Place is the latest release from Fun Stampers Journey + Spellbinders. This collection is filled with all things happy and carefree, and honestly - it's just what we need right now! Take a little break from real life, and feel like a kid again - stamp carousels, roller coasters and diecut a swimming pool. So here's the deal. Beginning June 20, 2020 you can grab the Happy Place Project Kit. It includes three stamp sets and a die set, plus all the supplies to make FOUR kitted cards.
You'll also receive a link for a make-and-take video to create the four cards shown below, right along with Creative Director, Kim Kesti. She'll share new techniques, tips, and tricks along the way. Then, go crazy and craft all your own fun ideas with these stamps.
THEN, on July 10, the entire collection will release. You'll have the chance to buy anything from the kit individually, PLUS there are additional stamps, dies (and THE most awesome stencil) that aren't included in the kit.
I'm so glad you stopped by today! I hope you'll try out today's inky technique. I can't wait to see how you make this idea your own. If you try it, share it with me because I'd love to see what you create! And don't forget to shop the new Happy Place collection, and grab the project kit! I know you'll do some fun summer crafting with it. xoxo
Supplies on Today's Projects:


3 comments:
Love your cards! This technique creates a beautiful effect! I’m going to try it.
Love you post ! Just ordered from you! Do you know if the splash set will have dies? Thanks! Pat
Hi Pat, thank you so much for ordering! YAY! The Make a Splash set does not have coordinating dies.
Post a Comment