Showing posts with label card kit. Show all posts

Thursday, November 11, 2021

How to Make 40+ Cute Handmade Cards In One Day! {No Kidding!}

I love to make handmade cards - you probably do to, or else you wouldn't be here reading this. You definitely want to keep reading if:

  • You love to create card sets to give away as gifts 
  • You like to have a big stash of cards handy for all occasions
  • You love the sense of accomplishment, looking at a big stack of cards you made
  • You send a LOT of cards
  • You're looking for a simple card layout to reproduce
In today's post I'll show you a quick and easy formula for creating lots of different cards using just a few simple supplies. In fact, I made 47 cards in one day using this simple process. Plus, this idea is easy to customize with whatever supplies YOU love to use. Are you ready to learn my secrets to bulk card making? Let's go!

This blog post contains affiliate links. When you shop through my links, I receive compensation at no cost to you. Thank you from the bottom of my crafty heart!
In today's post I'll show you a quick and easy formula for creating lots of different cards using just a few simple supplies. In fact, I made 47 cards in one day using this simple process. Plus, this idea is easy to customize with whatever supplies YOU love to use. Are you ready to learn my secrets to bulk card making? Let's go!
Today's cards began with two products in my stash - a 6x6 pad of patterned paper, and a package of premade die cut shapes. 

But let's pause here for a moment - don't have a 6x6 pad of paper? Then use sheets of 12x12, or adjust the measurements and use 8.5x11. Or better yet, pull out your box of scrap paper (I know you have one) and let's use that up. Don't have premade die cut shapes? Die cut some basic shapes, and stamp out some sentiments. Go through your embellishments and use what you have. 

I love to share my favorite products and deals with you, but I am ALL FOR being creative with what we have. Your cards won't likely look anything like mine - because you're going to put your own spin on it, and use what YOU love.  Okay. . . .onward we go. Throughout this post, you'll see some of the cards I created, but don't worry - I didn't take a photo of all 47 of them!
Today's cards began with two products in my stash - a 6x6 pad of patterned paper, and a package of premade die cut shapes.   But let's pause here for a moment - don't have a 6x6 pad of paper? Then use sheets of 12x12, or adjust the measurements and use 8.5x11. Or better yet, pull out your box of scrap paper (I know you have one) and let's use that up. Don't have premade die cut shapes? Die cut some basic shapes, and stamp out some sentiments. Go through your embellishments and use what you have.   I love to share my favorite products and deals with you, but I am ALL FOR being creative with what we have. Your cards won't likely look anything like mine - because you're going to put your own spin on it, and use what YOU love.  Okay. . . .onward we go. Throughout this post, you'll see some of the cards I created, but don't worry - I didn't take a photo of all 47 of them!

Step 1: Prep Your Paper

If you're starting with a 6x6 piece of paper, just cut it in half on the 3-inch mark. Then, cut each half into two pieces, one 4-inch piece, and one 2-inch piece. Easy peasy. Cut a big stack of pieces for mix-and-matchability. (Each card will take one 4-inch and one 2-inch piece.) Did you notice, there's NO paper waste in this project!? As an alternate, you can also cut the paper into 3x3-in squares, and use them in the same way. I tend to do both, depending on the paper stash I'm using!
Visit my blog to see my simple formula for bulk creating handmade cards, that are all different. If you're starting with a 6x6 piece of paper, just cut it in half on the 3-inch mark. Then, cut each half into two pieces, one 4-inch piece, and one 2-inch piece. Visit my blog to see the rest of the  instructions for this simple handmade card idea

Step 2: Fold Card Bases

Here we're going to use what we've got again. I dug through my cardstock and chose sheets that matched the colors of my patterned paper.  I supplemented with white cardstock for some cards too. Sometimes I stock up on pre-made cards when I catch them on sale, but use whatever you like! Obviously you'll want to cut and fold however many card bases you plan to create.

Step 3: Mix, Match and CREATE!

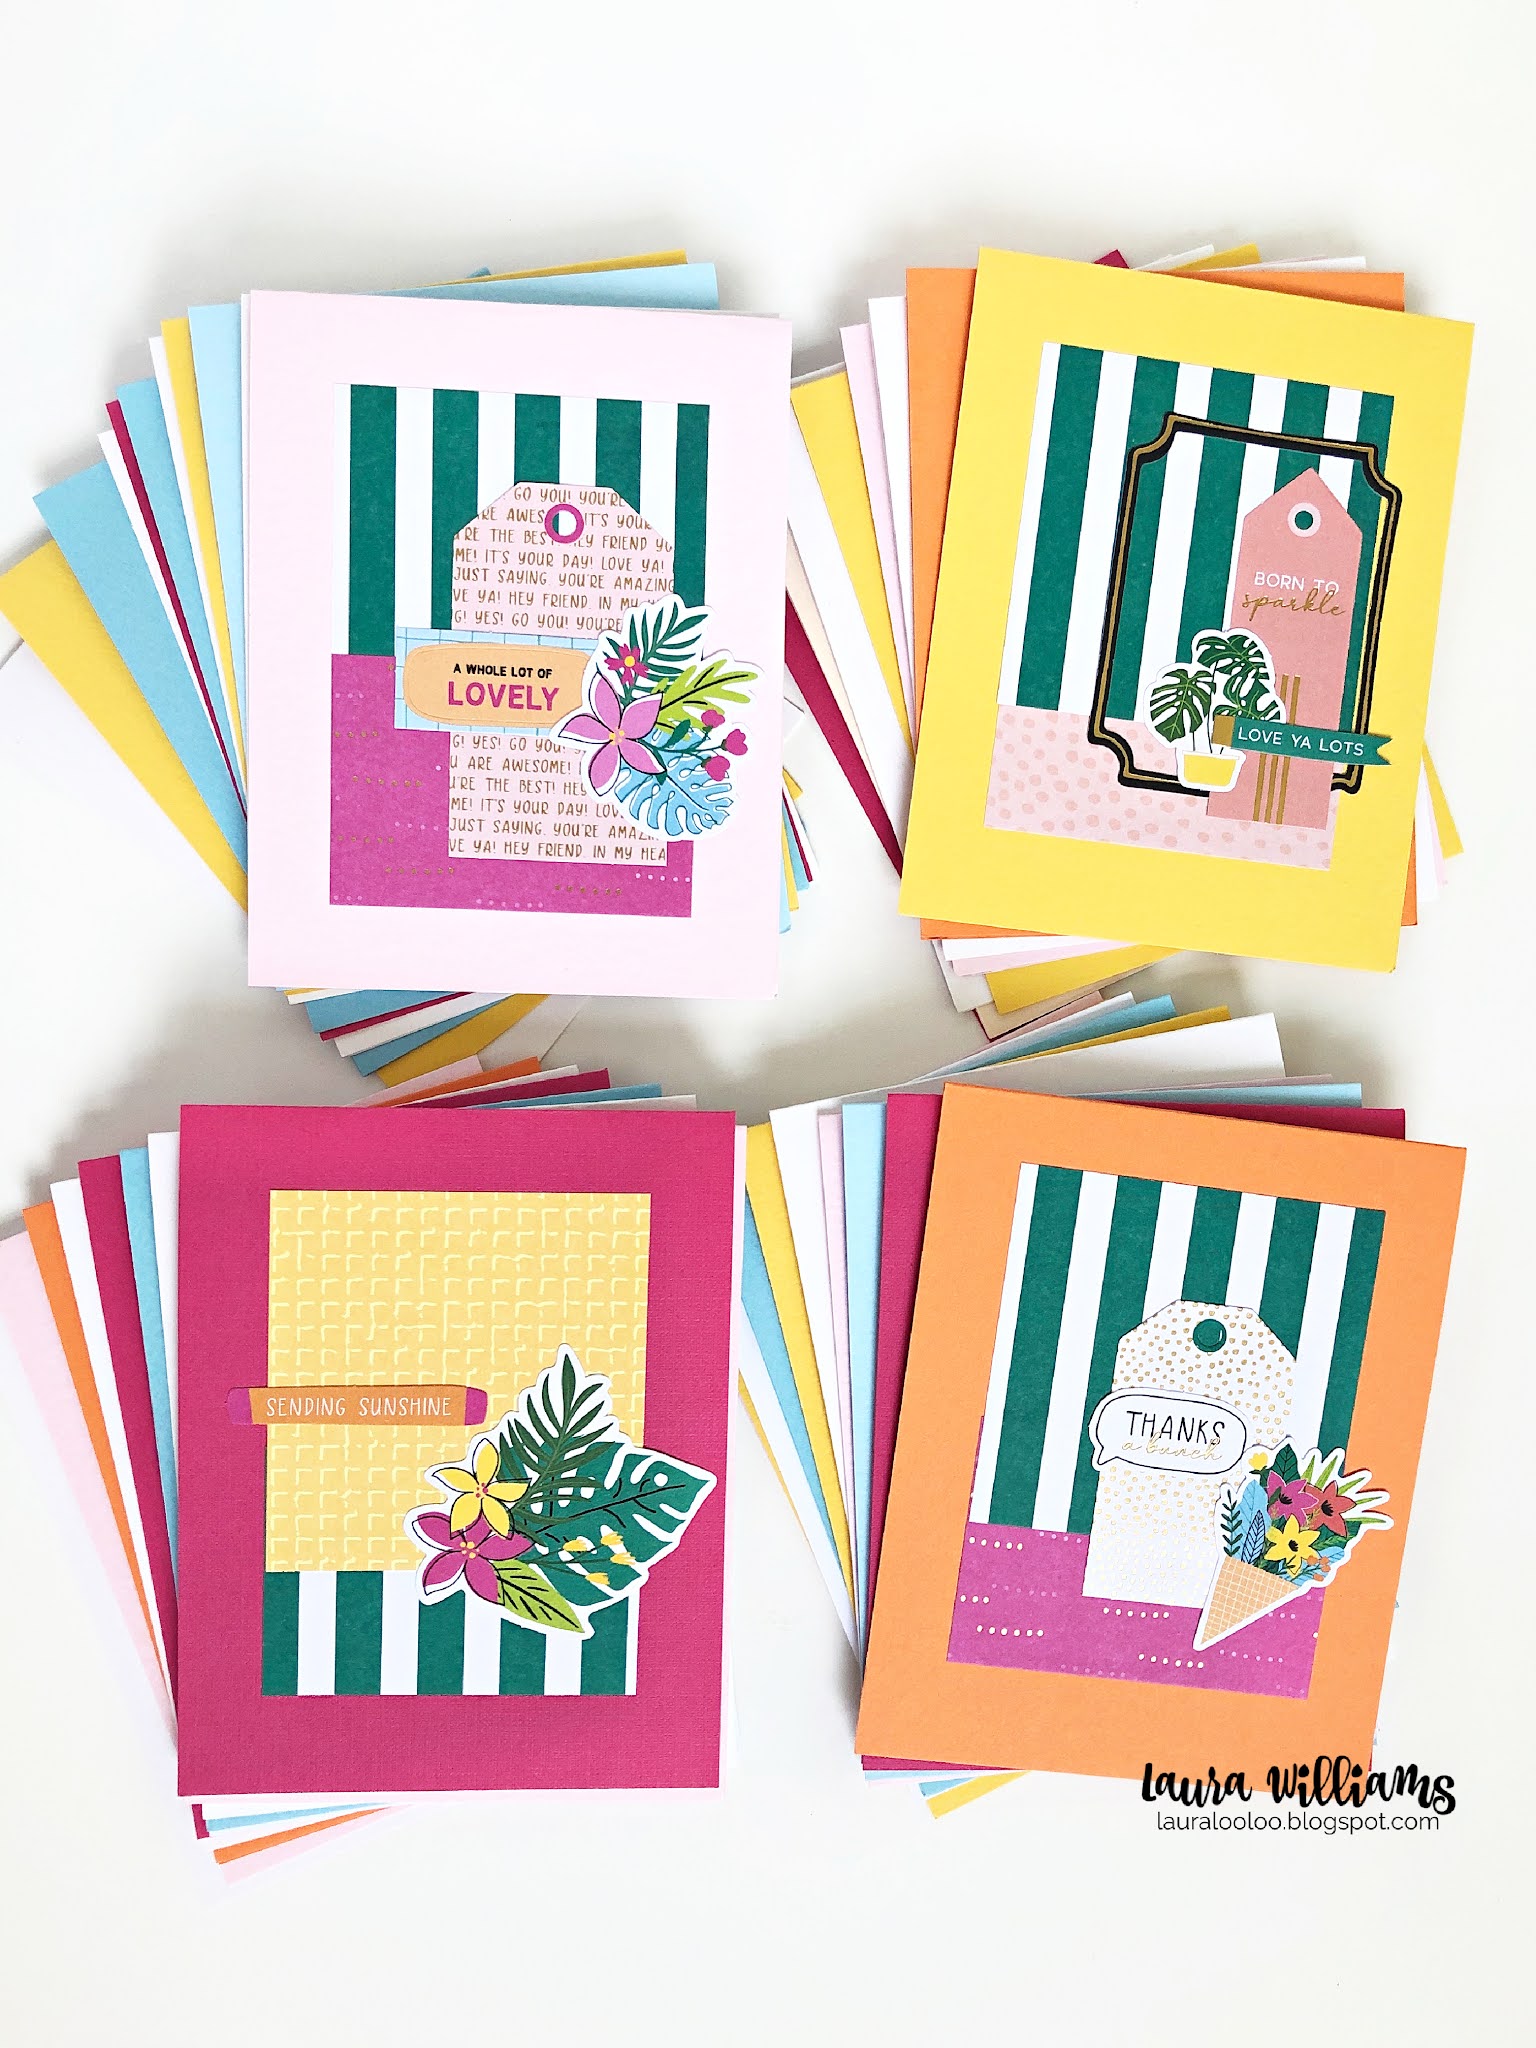
Now that we've gotten the busy work out of the way, it's time for the FUN PART. Grab two pieces of paper that look good together and center them on a card base - the pieces will overlap. Think about how the colors and patterns interact, so they aren't too busy together. Then spread all those delicious die cuts all over your desk and start pairing things together. 

You'll probably want a sentiment for each card, and then cluster together one, two or three images that work together. I glued all of these cards, rather than using foam squares, because they're easier to pop in the mail. But again - do what YOU love. 
Make a super simple handmade birthday card with 6x6 patterned paper, plus a few premade die cut shapes. This clean and simple idea is part of my formula for mass producing or bulk creating handmade cards. Stop by to see the simple instructions and lots of ideas like this one!
If you've looked at the cards in this post, you might realize that none of them REALLY look the same, do they? But they all follow the exact same formula. And that, my friends - is the magic. It's what makes the project simple and FUN.
Have you ever made 47 different cards in one day? Bulk creating handmade cards, or mass-producing is simple when you follow my easy formula. It makes creating FUN and simple. Visit my blog to see lots of ideas and inspiration, plus the simple steps to follow, and a list of the supplies - you probably have them in your crafty stash already!
Using ONE 6x6 pad, and ONE pack of premade shapes, I ended up with 47 cards. I'm not even kidding. Not too bad, huh?! I really do encourage you to use what you have for this project, but if you are interested in shopping, I do highly recommend the cute die-cut shapes and coordinating paper in Spellbinders Paper Arts card making kits. They are PACKED with so much goodness, including cardstock and embellishments. 

If you're in the market for a monthly club, you can get a new box of this goodness every month, in the Quick & Easy Card Kit of the Month Club. The monthly box of goodies includes stamps, dies, paper, embellishments and more. And if you're not looking for a monthly club, just check out the kits available in the shop. (You might even catch them on sale!)
In today's post I'll show you a quick and easy formula for creating lots of different cards using just a few simple supplies. In fact, I made 47 cards in one day using this simple process. Plus, this idea is easy to customize with whatever supplies YOU love to use. Are you ready to learn my secrets to bulk card making?
You'll find a whole assortment of past Card Kits on clearance right now, if you'd like to try one out to see what they're like.
Making a whole stack of handmade cards can be simple and fun - stop by and see my easy formula for mass-producing a whole pile of different handmade cards for any occasion. Make card sets to give as gifts, or just add to your stash of handmade cards to give out. Stop by my blog to see a whole bunch of ideas, and all my tips for bulk creating cute handmade cards like this one!
So, what do you think? Does this simple card making idea sound like something you can handle? I'd love to see you try it out! Remember the formula - two prints of patterned paper, a sentiment, and a few die cut images, and you're all set to create a whole pile of cards! (Can you beat my record of 47?)
Here's all 47 cards I made, using a simple formula with patterned paper and simple die cut embellishments. I'd love to share all my tips and tricks for mass-producing handmade cards, so stop by and visit this blog post for all the card making details!
Want a kit EVERY MONTH? Join the Card Kit of the Month Club!

updated 9/28/23

Tuesday, July 9, 2019

Meet Spellbinders July Card Kit of the Month - Shellebrate!

There's just something magical about mermaids and bubbles and seashells in the summertime, isn't there? They're such fun all year long, but summertime is MADE for this. The Spellbinders Card Kit of the Month for July is called Shellebrate, and it is packed with all you need to create dreamy, underwater scenes with mermaids, swaying underwater grasses, adorable sea creatures, and seashells. 
You guys, these card kits are absolutely PACKED with goodness. The kit information says that you can create 10 cards because the kit includes 10 card bases with envelopes. But I'm here to tell you that I've created 7 cards so far, and I haven't even made a DENT in the supplies. Seriously. Mermaid.Cards.For.Days. (Yay!!!) 

With so much goodness in this kit, I decided to knock out some birthday cards that someone asked me to make. I followed the same basic card layout for the cards below, but mixed and matched the papers and accessories in the kit. The only thing I added to these cards is a little Sparkle Washi Tape and sequins. It's a simple layout, allowing the fun die cut shapes and patterned papers to shine!

 The card below is the same layout, just turned horizontally. TIP - Bring new life out of a favorite card sketch or layout idea by turning it sideways or upside down! 

I made 6 Shellebrate cards and it was so much fun to mix and match the shells and mermaids. The card kit comes with foam stickers, die cut shapes and self-adhesive sparkly gems that are so gorgeous. Would you like a peek at ALL the goodness in this kit? It even includes an awesome mermaid die set plus a clear stamp set.

This blog post contains affiliate links. When you purchase through my links, I may receive compensation at no additional cost to you. Thank you from the bottom of my crafty heart!
Do you love this kit, but you don't want quite everything? Or maybe you love it so much you need a few extras? Check out the Monthly Card Kit Extras, where you can snag just the Shellebrate stamp set, the 6x6 paper pack, stickers, or die cut shapes individually.

Interested in the whole thing? Find all the details on the Spellbinders Card Kit of the Month where you'll find all the info and more inspiration using this MERMAZING card kit! ;)

Tomorrow I'll be back with more projects using the Shellebrate Card Kit of the Month - I did some mixing and matching with the FSJ Stamp of the Month and coordinating die set. These two go hand in hand . . .or should I say FIN in FIN? They complement each other so well, and I can't wait to show you - stop by tomorrow and hang with me again! xoxo