Want to create a fun new handmade card with your embossing folders? Try this idea using scraps of paper and your favorite embossing folder for a striped rainbow card for any occasion!
This blog post contains affiliate links. When you shop through my links I receive compensation at no cost to you. Thank you from the bottom of my crafty heart!
Let's take a look at the striped embossed technique on today's first card. It's quite easy, and it's a great way to use up scrap paper. Here we go:
- Trim a white cardstock rectangle just smaller than a card base. (4x5.25")
- Trim strips (or collect scraps from your stash) of any colors of cardstock. You can eyeball the sizes and trim as needed or if you like to be precise, here are the measurements I used (from top to bottom, in inches: 1.25", 1.5", 1", .75", .75")
- Lay the strips right next to each other and tape them to each other with washi or Spellbinders Best Ever Craft Tape (it's like washi, but better!!!) You can use your white panel to eyeball the size and arrangement. You'll be adhering the strips to that panel later.
- Next, lay the taped strips in an embossing folder and run through die-cutting machine.
- Finishing off this card is simple because the embossed rainbow stripes are the star of the show. Don't even bother removing the washi tape from the back, and just adhere the taped pieces to the white cardstock panel. Then, add that to your card base. A die cut sentiment and a few sparkly gems complete this card.
Let's look at one more card using this same technique. This card is a 5x7 larger format card, but the technique is all the same!
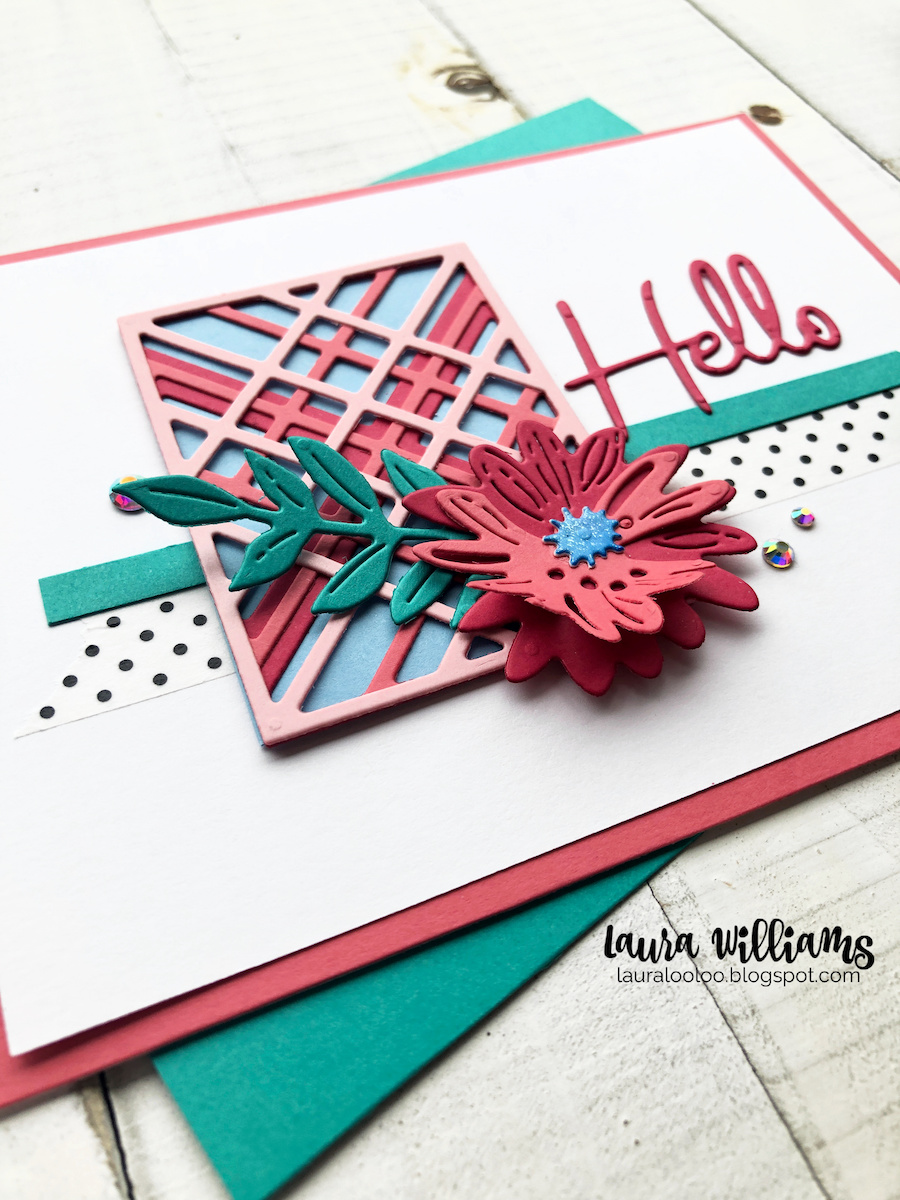
Before you go, let's look at one more card featuring the Simply Perfect collection you saw above! This one features some sweet die sets that you'll use all year long. The Kaleidoscope Plaid Die Set was released at Christmastime but we're giving it a springtime twist this season. Let's take a look at this clever die set.
The Kaleidoscope Plaid set (no longer available) is made up of three dies. Die cut each in a different color and layer them to achieve this amazing plaid panel. Four panels will fill a normal card base, or use just one like I did on this card. They fit perfectly on slimline cards and gate fold cards too! The possibilities are actually endless with this cool set.
I paired the plaid panel with a fun floral die set called Simply Perfect Layered Blooms. This set can be layered and used in so many ways. Then I finished off the card with another scripty sentiment. I think what I love about all of these new products the most is that they can be mixed, matched, layered and put together in so many ways. They are truly versatile products we'll use again and again. And the new cardstock - dang, you guys, it cuts, embosses, die-cuts, and stamps SO nicely.
Supplies on Today's Cards:
Best Ever Craft Tape
Kaleidoscope Plaid Die Set (no longer available)
Simply Perfect Layered Blooms Dies (no longer available)
Pin it! Save it! Share it! Make it!
links updated 9/30/25


1 comment:
Those are beautiful cards!! I just ordered the die set!
Post a Comment