Showing posts with label card sets. Show all posts

Thursday, March 26, 2026

Four {Clean and Simple} Floral Card Ideas with No Coloring

Intricate floral stamps are gorgeous for card making, but even if detailed coloring isn't your favorite - you will make super simple and stunning cards using heat embossing, and beautiful shades of cardstock. Today's cards are part of an elegant four-card set that I created using the Wild Rose stamp set, from Simon Says Stamp.

This blog post contains affiliate links. When you shop through my links, I receive compensation at no cost to you. Thank you from the bottom of my crafty heart!

Today's blog post is short and simple, because these cards are pretty self-explanatory. Each of today's four cards features simple heat embossing. I chose a few colors of cardstock and stuck to the same basic style, so these cards could be gifted together as a coordinating set, or used individually. 
If you try out this idea, remember that white embossing will show up more boldly on darker colors of cardstock (although subtle is lovely too, as you'll see on the pale pink card.) This idea would be gorgeous with metallic embossing as well. 
The Wild Rose stamp set included everything I needed for the gorgeous florals as well as the sentiments. It's part of the In My Heart collection from Simon Says Stamp, which is filled with sweet sentiments, springtime goodness and stamps/dies you'll use all year long. Check out the entire collection on the Simon website! 

Shop the Supplies on Today's Cards:
(I used Coral, Bellini, Orchid, and Rainforest from this collection)


For more coordinating card set ideas, check out this blog post too!


Thursday, December 4, 2025

5 Ways to Use Paper Strips for Card Making {Plus See what's NEW from Simon Says Stamp}

 "I'm in love! I'm in love! And I don't care who knows it!" (Please say it like Buddy the Elf, while throwing your hat in the air. Thank you.) I'm honestly pretty smitten with today's die set. It checks a lot of boxes for me: Simple to use (check.) Totally versatile (check.) Helps me make a bunch of cards at once. (check check.) In today's post you'll find some helpful tips for mass-producing cards and using paper scraps - so stick with me as we look at FIVE different ways to use the new Stripped die from Simon Says Stamp for an adorable card set. 

This blog post contains affiliate links. When you shop through my links, I receive compensation at no cost to you. Thank you from the bottom of my crafty heart!

Let's start at the beginning, shall we? Here's our starting point. Five 6x6 sheets of patterned paper and this awesome card-sized die, called Stripped, that will perfectly trim a striped background. (HERE'S A TIP: However many pieces of paper you start with is how many card bases you'll end up with. I used five patterns, to create five cards.)

Step One: Die cut the Stripped die from each piece of patterned paper. I recommend laying the strips out in some semblance of organization to make life easier as you assemble. You can see my piles in the photo below, as I've started assembling my first card. Once you have those piles, simply start mixing and matching to create the background of your card. I recommend using glue for this, because you can gently slide your pieces if something isn't stuck down quite right. Start with one strip all the way at the end of your card, make sure it's straight, and then just go from there. 
I do believe I promised you FIVE different ways to use this set so let's look at the first card idea. (All of today's cards also feature the Just Sayin' stamp set and coordinating dies - so adorable!) 

1. Straight Up!

This first card is just straight forward, striped goodness and a stamped/die-cut sentiment. 

2. Straight Up But Sideways

Whether you use this set horizontally or vertically, the process is still the same. I rounded the bottom corners on this cutie just to be a little different. 

3. Trim it and Mat it

Rinse and repeat for number three EXCEPT, adhere the strips on a flat panel of cardstock, and then trim the edges to create a smaller area to mat on your card base. Plus - don't miss the inlaid die-cutting happening on this card. After trimming the panel, consider die cutting a shape from the center. It created a perfect dimensional landing spot for my sentiment.

4. Die-cut it and then Die-cut it Again

How about using a striped die-cut panel and cut a shape from it? In the last idea you saw the negative space left behind, but this time let's use a panel to make a giant heart.

5. Make Stripes From Your Stripes

Another way to make different use of your striped panel, is to only use part of it. Cut it in half as shown below, or even into smaller strips for a striped stripe. (How's THAT for a tongue twister?)
Crafty friends, these are only just a few of the ways you can use this Stripped die from Simon Says Stamp. And remember - if you don't have this die, everything I did here could be created with papers from your scrap bin and a paper trimmer. BUT I gotta say, it was so nice working with these pieces that all cut exactly the same. It removed all the math and guess work - so mass producing a whole variety of cards was much less frustrating and a lot more fun!

If you're pretty sure you can't live without today's cute products - you're in luck! They're part of the new DieCember release at Simon Says Stamp. I hope you'll go check out all the new items and enjoy all kinds of inspiration. 

Don't Miss Out on the Fun:

  • Stop by the Simon Says Stamp website to see the entire DieCember collection. 
  • Join the SSS YouTube Live Stream at noon EST on Thursday December 4th. Click HERE to be notified when they’re live.
  • Don't miss the two-day blog hop Friday Dec 5th and Saturday the 6th! 
  • Check out the Instagram hop on Monday, December 8th.
Shop the Supplies on Today's Cards
(all sold at Simon Says Stamp)


(you can also purchase just the stamps or just the dies - but trust me, 
you want it all, and it's a very reasonable price!)

(it's just a coincidence that this SB patterned paper has the same name 
as the SSS stamp/die set - but dang, they sure look cute together!)
I'm so glad you stopped by today! Which striped idea is your favorite? Any ideas for MORE ways to use this die? I'd love for you to share them in the comments! 

Looking for more inspiration with Simon Says Stamp?
You might love these too!

Wednesday, July 19, 2023

How to Make Cute Christmas Cards With Paper Scraps and Simple Die Cuts {3 Colorful Ideas!}

Are you looking for quick and easy Christmas card ideas that use minimal product, and are simple to pop in the mail this holiday season? I've got you covered with today's cute and colorful Christmas cards that use strips of patterned paper (raid your scrap bins, or make the most of a 6x6 paper pad) and simple die cut shapes. As you check out today's blog post, think about how you can take this idea and make it your own!

This blog post contains affiliate links. When you make purchases through my links I receive compensation at no cost to you. Thank you from the bottom of my crafty heart! 

Today's cards all follow the same formula. I'm a big fan of coming up with an idea that's repeatable, and can be tailored to a variety of product. Why reinvent the wheel each time? Make something you love, and then... do it again! Let's look at the formula for these cards. 

To create this layout, you'll need:

  • three strips of paper: This is a great time to pull out a cute 6x6 paper pad because all of the patterns will coordinate nicely. But you could just as easily raid your scrap papers and play around with patterns too. 
  • simple die cut greenery. I suggest grabbing some dies and cut a bunch all at once, from a few shades of coordinating greens.
  • simple sentiments stamped on simple die cut shapes. I always.always.always grab the Rounded Rectangle Layers die set from Impression Obsession and I always have a bunch of these shapes pre-cut in an envelope, because I use it so often. It's my go-to for adding stamped sentiments onto cards.
  • Add some washi tape, or embellishments IF you want. I stuck with glitter washi, and mini staples so my cards would still be flat and easy to mail.
As you'll see, each of these cards followed the same process, just using different colors of cardstock and papers. The paper strips are cut between 3-4 inches long, but I wasn't exact. I just worked with what I had. I mixed and matched the greenery, just to keep the size and colors balanced but there's no rules about this either. Lastly, I added sentiments and a little washi strip underneath, just to ground the sentiment a bit.
And if you're not quite ready to think about holiday card making yet. . . think beyond Christmas. Switch up the paper, and use different dies and sentiments, and follow the formula for a whole stack of birthday cards, or thank you cards. Just a simple swap of product and you can use this idea for cards any time of year.

Today's post is part of our Christmas In July day on the Impression Obsession blog. Stop by the blog for links to all the designers participating. 

Have you been to the IO website lately? There's an amazing die cutting sale going on that you DON'T want to miss! Grab some of our best selling dies, as well as old favorites for 40% off! (Yes! FOURTY!) The sale includes the Rounded Rectangle Layers die (that I just can't get enough of) and I don't think we'll ever see the price that low again.

Plus, check out the entire NEW PRODUCTS section to see the latest release.

Thursday, December 8, 2022

Try This Super Simple Winter Card Set With Patterned Paper

We're wrapping up our four-day holiday blog hop at Impression Obsession today! It's been a festive and fun week of holiday card making, but we aren't done yet! Today, I've got a winter card set idea that you can make super quickly, to cover all your winter occasions or to assemble as a gift set. Plus, I'll show you a simple way to create these cards for any time of year!

This blog post contains affiliate links. When you purchase through my links, I receive compensation at no cost to you. Thank you from the bottom of my crafty heart!
We're wrapping up our four-day holiday blog hop at Impression Obsession today! It's been a festive and fun week of holiday card making, but we aren't done yet! Today, I've got a winter card set idea that you can make super quickly, to cover all your winter occasions or to assemble as a gift set. Plus, I'll show you a simple way to create these cards for any time of year!
There's something really satisfying about knocking out a whole stack of handmade cards in an afternoon. The easiest way to make that happen is to find a formula and stick with it. The formula for today's cards is: sentiment stamped on a die-cut circle, 3x4 piece of patterned paper, plus a smattering of shiny sequins. BOOM. Done. 

All of today's cards are on shades of purple - it's not a color I use often, but it's pretty dreamy with the snowscapes in the Winter Scenes 6x6 paper pack at Impression Obsession. (TIP: Trim the patterned paper  into three-inch widths, so you can get two cards for each sheet of 6x6 paper!)

Remember, all it takes is swapping out the paper and sentiments to create this card set for any time of year. Be sure to check out my summer version at the end of this blog post! 
There's something really satisfying about knocking out a whole stack of handmade cards in an afternoon. The easiest way to make that happen is to find a formula and stick with it. The formula for today's cards is: sentiment stamped on a die-cut circle, 3x4 piece of patterned paper, plus a smattering of shiny sequins. BOOM. Done.   All of today's cards are on shades of purple - it's not a color I use often, but it's pretty dreamy with the snowscapes in the Winter Scenes 6x6 paper pack at Impression Obsession. (TIP: Trim the patterned paper  into three-inch widths, so you can get two cards for each sheet of 6x6 paper!)
Here's the scoop on our December Holiday Blog Hop!
  • December 5th– 8th The IO Team will be sharing holiday projects! Find a daily list of participants on the Impression Obsession blog.
  • We will give away THREE Impression Obsession $25 gift certificates for the event so the more you comment through our Holiday Hop the more chances to win!
  • All comments for the event will be open until Tuesday December 13th at 8pm CT
  • All winners will be announced on Wednesday December 14th on the Impression Obsession Blog.
Don't Miss a Stop On the Hop!
Laura Williams <<you are here!>>

Shop the Supplies on Today's Cards:

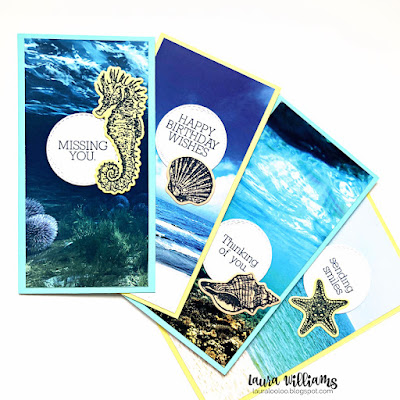
Want to make a similar card set for summer or fall? Don't miss the By the Sea and Autumn Scenes 6x6 paper packs, and check out the mini slimline card set I created for summer:

Thursday, November 11, 2021

How to Make 40+ Cute Handmade Cards In One Day! {No Kidding!}

I love to make handmade cards - you probably do to, or else you wouldn't be here reading this. You definitely want to keep reading if:

  • You love to create card sets to give away as gifts 
  • You like to have a big stash of cards handy for all occasions
  • You love the sense of accomplishment, looking at a big stack of cards you made
  • You send a LOT of cards
  • You're looking for a simple card layout to reproduce
In today's post I'll show you a quick and easy formula for creating lots of different cards using just a few simple supplies. In fact, I made 47 cards in one day using this simple process. Plus, this idea is easy to customize with whatever supplies YOU love to use. Are you ready to learn my secrets to bulk card making? Let's go!

This blog post contains affiliate links. When you shop through my links, I receive compensation at no cost to you. Thank you from the bottom of my crafty heart!
In today's post I'll show you a quick and easy formula for creating lots of different cards using just a few simple supplies. In fact, I made 47 cards in one day using this simple process. Plus, this idea is easy to customize with whatever supplies YOU love to use. Are you ready to learn my secrets to bulk card making? Let's go!
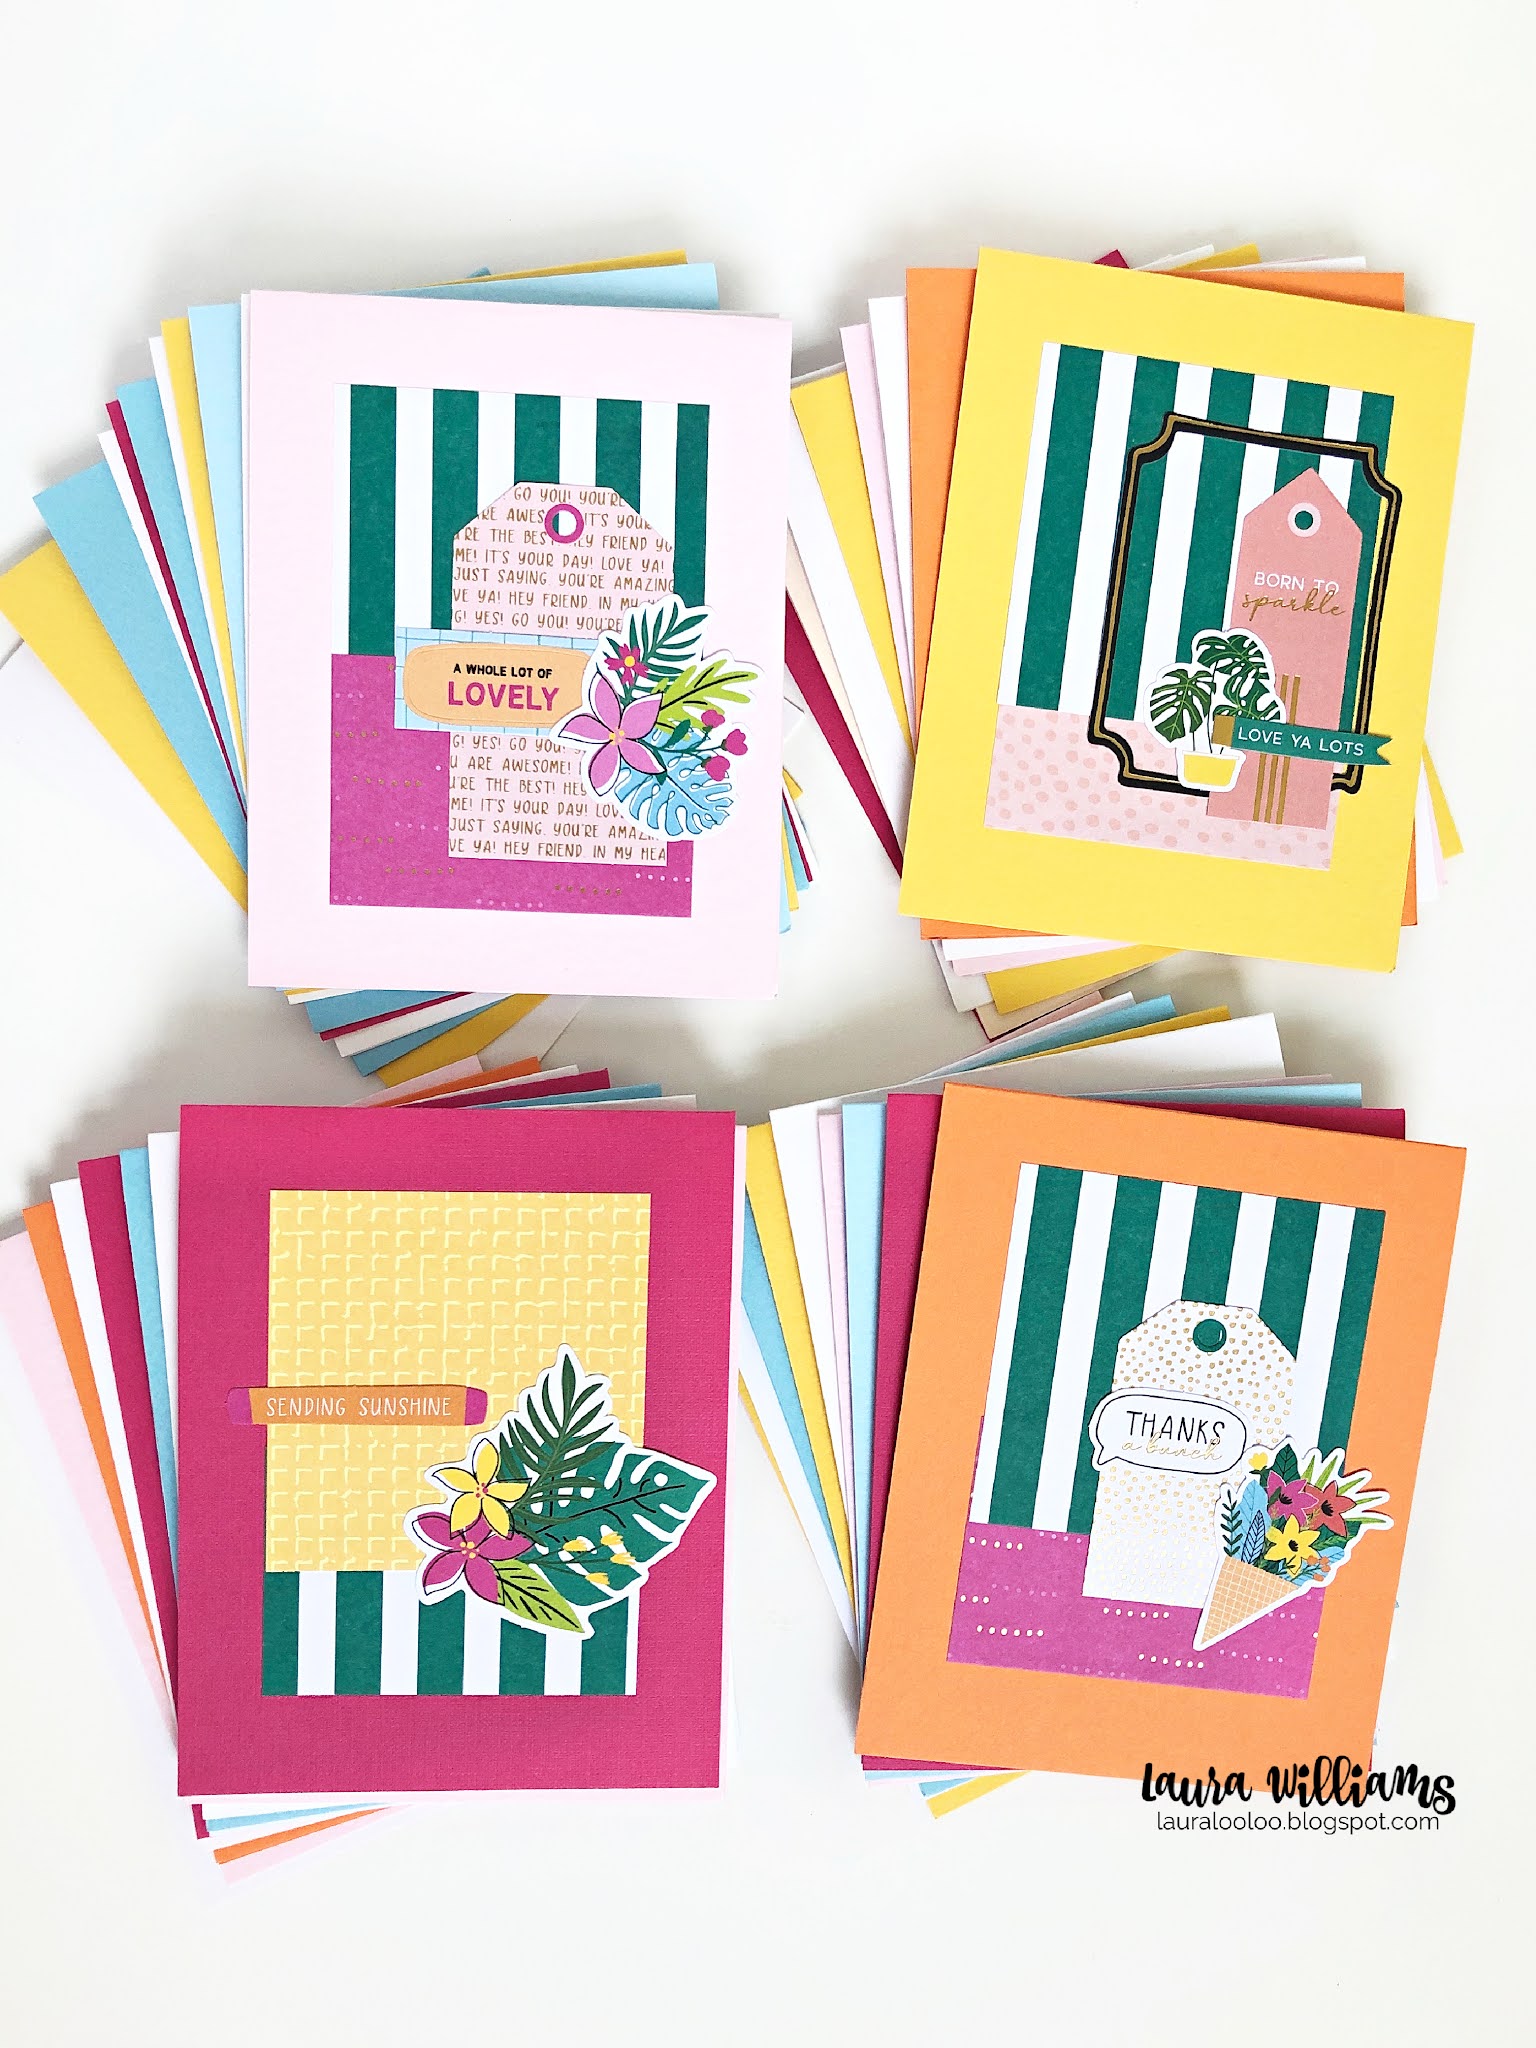
Today's cards began with two products in my stash - a 6x6 pad of patterned paper, and a package of premade die cut shapes. 

But let's pause here for a moment - don't have a 6x6 pad of paper? Then use sheets of 12x12, or adjust the measurements and use 8.5x11. Or better yet, pull out your box of scrap paper (I know you have one) and let's use that up. Don't have premade die cut shapes? Die cut some basic shapes, and stamp out some sentiments. Go through your embellishments and use what you have. 

I love to share my favorite products and deals with you, but I am ALL FOR being creative with what we have. Your cards won't likely look anything like mine - because you're going to put your own spin on it, and use what YOU love.  Okay. . . .onward we go. Throughout this post, you'll see some of the cards I created, but don't worry - I didn't take a photo of all 47 of them!
Today's cards began with two products in my stash - a 6x6 pad of patterned paper, and a package of premade die cut shapes.   But let's pause here for a moment - don't have a 6x6 pad of paper? Then use sheets of 12x12, or adjust the measurements and use 8.5x11. Or better yet, pull out your box of scrap paper (I know you have one) and let's use that up. Don't have premade die cut shapes? Die cut some basic shapes, and stamp out some sentiments. Go through your embellishments and use what you have.   I love to share my favorite products and deals with you, but I am ALL FOR being creative with what we have. Your cards won't likely look anything like mine - because you're going to put your own spin on it, and use what YOU love.  Okay. . . .onward we go. Throughout this post, you'll see some of the cards I created, but don't worry - I didn't take a photo of all 47 of them!

Step 1: Prep Your Paper

If you're starting with a 6x6 piece of paper, just cut it in half on the 3-inch mark. Then, cut each half into two pieces, one 4-inch piece, and one 2-inch piece. Easy peasy. Cut a big stack of pieces for mix-and-matchability. (Each card will take one 4-inch and one 2-inch piece.) Did you notice, there's NO paper waste in this project!? As an alternate, you can also cut the paper into 3x3-in squares, and use them in the same way. I tend to do both, depending on the paper stash I'm using!
Visit my blog to see my simple formula for bulk creating handmade cards, that are all different. If you're starting with a 6x6 piece of paper, just cut it in half on the 3-inch mark. Then, cut each half into two pieces, one 4-inch piece, and one 2-inch piece. Visit my blog to see the rest of the  instructions for this simple handmade card idea

Step 2: Fold Card Bases

Here we're going to use what we've got again. I dug through my cardstock and chose sheets that matched the colors of my patterned paper.  I supplemented with white cardstock for some cards too. Sometimes I stock up on pre-made cards when I catch them on sale, but use whatever you like! Obviously you'll want to cut and fold however many card bases you plan to create.

Step 3: Mix, Match and CREATE!

Now that we've gotten the busy work out of the way, it's time for the FUN PART. Grab two pieces of paper that look good together and center them on a card base - the pieces will overlap. Think about how the colors and patterns interact, so they aren't too busy together. Then spread all those delicious die cuts all over your desk and start pairing things together. 

You'll probably want a sentiment for each card, and then cluster together one, two or three images that work together. I glued all of these cards, rather than using foam squares, because they're easier to pop in the mail. But again - do what YOU love. 
Make a super simple handmade birthday card with 6x6 patterned paper, plus a few premade die cut shapes. This clean and simple idea is part of my formula for mass producing or bulk creating handmade cards. Stop by to see the simple instructions and lots of ideas like this one!
If you've looked at the cards in this post, you might realize that none of them REALLY look the same, do they? But they all follow the exact same formula. And that, my friends - is the magic. It's what makes the project simple and FUN.
Have you ever made 47 different cards in one day? Bulk creating handmade cards, or mass-producing is simple when you follow my easy formula. It makes creating FUN and simple. Visit my blog to see lots of ideas and inspiration, plus the simple steps to follow, and a list of the supplies - you probably have them in your crafty stash already!
Using ONE 6x6 pad, and ONE pack of premade shapes, I ended up with 47 cards. I'm not even kidding. Not too bad, huh?! I really do encourage you to use what you have for this project, but if you are interested in shopping, I do highly recommend the cute die-cut shapes and coordinating paper in Spellbinders Paper Arts card making kits. They are PACKED with so much goodness, including cardstock and embellishments. 

If you're in the market for a monthly club, you can get a new box of this goodness every month, in the Quick & Easy Card Kit of the Month Club. The monthly box of goodies includes stamps, dies, paper, embellishments and more. And if you're not looking for a monthly club, just check out the kits available in the shop. (You might even catch them on sale!)
In today's post I'll show you a quick and easy formula for creating lots of different cards using just a few simple supplies. In fact, I made 47 cards in one day using this simple process. Plus, this idea is easy to customize with whatever supplies YOU love to use. Are you ready to learn my secrets to bulk card making?
You'll find a whole assortment of past Card Kits on clearance right now, if you'd like to try one out to see what they're like.
Making a whole stack of handmade cards can be simple and fun - stop by and see my easy formula for mass-producing a whole pile of different handmade cards for any occasion. Make card sets to give as gifts, or just add to your stash of handmade cards to give out. Stop by my blog to see a whole bunch of ideas, and all my tips for bulk creating cute handmade cards like this one!
So, what do you think? Does this simple card making idea sound like something you can handle? I'd love to see you try it out! Remember the formula - two prints of patterned paper, a sentiment, and a few die cut images, and you're all set to create a whole pile of cards! (Can you beat my record of 47?)
Here's all 47 cards I made, using a simple formula with patterned paper and simple die cut embellishments. I'd love to share all my tips and tricks for mass-producing handmade cards, so stop by and visit this blog post for all the card making details!
Want a kit EVERY MONTH? Join the Card Kit of the Month Club!

updated 9/28/23