Showing posts with label go-to-gal. Show all posts

Wednesday, December 3, 2014

Farewell Blog Hop {Paper Crafts & Scrapbooking magazine}

Hello friends! Today is an example of the width and depth of community that us paper crafters share, much of which was established by Paper Crafts & Scrapbooking magazine. Within hours of the announcement that PC&S would be ceasing publication, people were already coming together, and making plans to celebrate and honor the magazine and the lovely people who work to make it happen. We've spent the past few weeks sharing memories, photos and projects. Today I thought I'd share some of my favorite published cards in Paper Crafts & Scrapbooking.

First up, I created this card using multi-ink stamping, with Sweet 'n Sassy stamps. It turned out just the way I had it in my head, and I loved it. Even sweeter, this card ended up on the cover of the September/October 2013 issue, one of my favorite covers of all time! (that chalkboard text, swoon!)


Next, this Great Job card, featuring adorable Paper Smooches stamps. The whole thing is paper-pieced, down to the tiny apple leaf. This card was featured in Paper Crafting Tips and Tricks, from November 2012.


And last for today, a Nifty 50 party ensemble. I created this ensemble as part of my Go-to Gal tryout, and it was later published in the Party Ensembles book. Fun facts? That 50 Nifty Crosswords book? Yeah, it's not even a crossword book. It's a word search book. It was the right size though, and I knew no one would see the inside! The crossword paper, was just a crossword puzzle I printed from the internet.

And now, hop along your crafty way through this gigantic blog hop! 
You should have come here from Gayatri Murali 
and next up, is Maria Fischer
(If you're just joining us. . .head to Jennifer McGuire to start at the beginning!)


PS - I'm sharing a fun project over on the Paper Crafts & Scrapbooking blog today, for the very last time. . .stop on by and see what I created! xoxo


Wednesday, November 26, 2014

Go-to Gal Designer Challenge {Neat & Tangled}

Hello friends! Today is a Go-to Gal Designer Challenge! We're happy to be sharing some fabulous products from Neat and Tangled today! Neat and Tangled is sweet company that sells the best quality photopolymer clear stamps, made in the USA! (Woot woot!)

I've been creating like crazy, with the Just For You stamp set. This first card I created for an inside-and-out call for Paper Crafts & Scrapbooking a few months ago. This is the front of the card. . .

and in this photo you can see the inside of the card too. (It's two copies of the same card.) 

Next, I stamped the balloons in assorted ink colors. I love the way they overlap and the colors show through, just like real balloons would. It was fun to play with all these bright colors!

I can't wait to see what the other Go-to Gals have created with their Neat & Tangled goodies! Stop on by and visit them all!

Also, stop by and visit the Neat & Tangled website, Neat & Tangled on Facebook, and Neat & Tangled on Pinterest!  Thanks for coming by today!

Monday, November 24, 2014

Go-to Gal Blog Hop {Paper Crafts & Scrapbooking magazine}

I've already talked a bit about Paper Crafts & Scrapbooking magazine coming to a close. Us Go-to Gals decided to take today to celebrate the magazine, the editors, and our time as Go-to partners in crime, with a little blog hop. (Because blog hops - well, it's what we do, y'all.) 

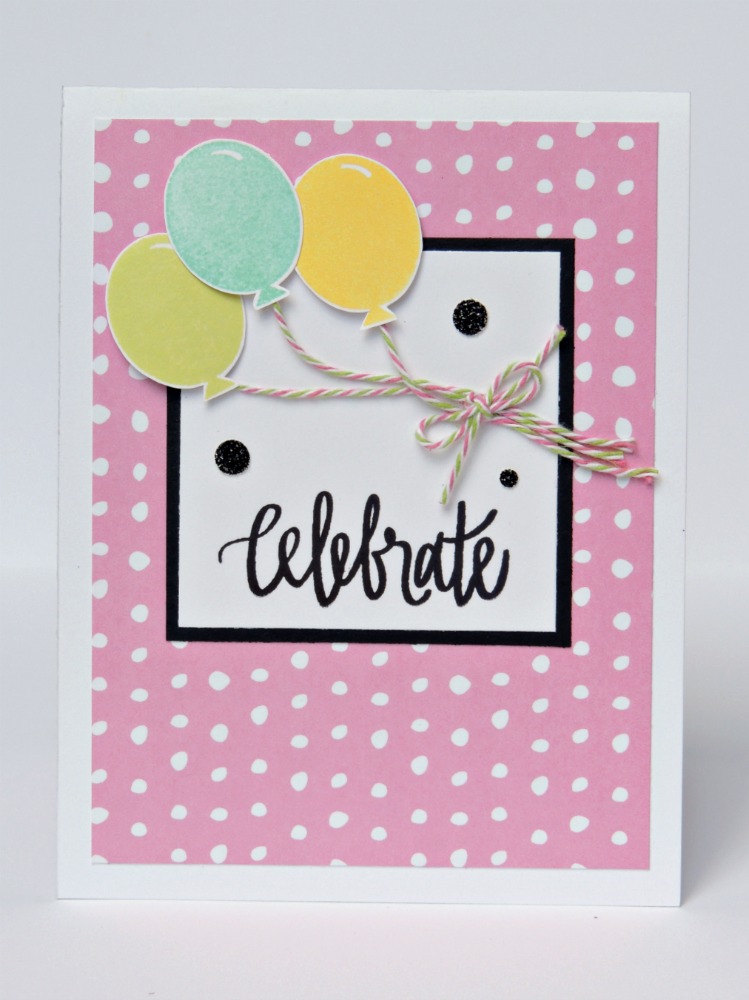
I'll admit - I didn't create this card especially for today's blog post. It's been sitting in a file for quite some time actually. I was just fooling around with Paper Smooches dies and some patterned papers, and this card came together. And I kinda loved it. So I hoarded it and saved it for the perfect pub call, or the perfect day. Today. Is. That. Day.

I've already shared my sadness and my reflections about the magazine. . . . today, what I'd really like to say is THANK YOU. It's fitting that this week we'll celebrate Thanksgiving, because although I'm feeling lost and incredibly disappointed at the loss of our magazine, I'm overwhelmingly thankful.

Sweet editors, past and present:
Thank you. . . 
for accepting that first card for publication, in 2008. It started something kinda magical!
for invitations to magazine assignments. for trusting my art, and for trusting me as a reliable designer.
for the invitation to try out to become a Go-to Gal. (It was epic to receive even that.)
for THE phone call. for knocking my socks off in surprise.
for bringing together all kinds of people who have become crafty, kind, beautiful friends, and otherwise wouldn't have probably ever known each other.
again, for trusting my art, and for trusting ME with the responsibility.
for making me laugh till I cry on a regular basis.
for stressing me out with scary assignments that I'm not sure I can do.
for giving me the opportunity to prove to myself that i CAN.
for being my cheerleaders and my coaches every step of the way.
for ridiculous hashtags like #poundsign and #swine 
for TEACHING me. (Seriously, every time I have a conversation with Jennifer, I learn something.)
for laughing at me. for helping me understand that I'm a pretty okay person, with something to offer.
for trips to Utah. Kind of a highlight of my adult life. (Is that bad? I mean, my family tops my highlights list, but after that. . .well. . . .editorial board meetings in Utah. It's right up there.) 
for snowy (early) mornings at Starbucks. #earlybirdsrock

Dear Go-to Gals:
Thank you. . .
for inspiring me.
for laughing at me.
for doing hilarious things that i can laugh at. (Betsy. Dishwasher detergent. Enough said.)
for becoming fast and fierce friends.
for being dependable, available practically 24 hours a day, and for completely GETTING me.
for teaching me. so very VERY many things I've learned from you!
for your extreme generosity and kind hearts.
dang we work well together, don't we? 

I'm thankful that we're all just an email or text away from each other, as always. Things will never be the same again. But the friends I've made, are still my friends whether there's a magazine or not. And for that, I am MOST thankful of all!

Please head around to visit the other Go-to Gals participating today. . . (Laina is on a cruise in the Caribbean, so we've decided to let her off the hook today.


Wednesday, November 19, 2014

Cheering Up the China Cabinet {painted furniture tutorial}

Today, my friends, I'd like to officially introduce you to my happy china cabinet! But before you meet her, I'd like you to meet my dark, sad, lovely-in-her-own-way china cabinet. (Also known as: The Before Photo)


You may not wish to hear all the details about this china cabinet, but this is my blog, so I'm going to tell you. It was given to my husband when he was in college. It filled the entire wall of his apartment, as it had two other pieces, but each time we've moved, we've er - lost one. It was already well-loved when Eric got it, and we've been married now for 13 years, so this cabinet has definitely lived a good life. And it is pretty cool. I love the detail at the top. But it's DARK. And in the we-can't-paint-the-walls townhouse where we live, I miss COLOR. I'm a pretty bright and cheery person, and our living room is white and brown. Booooo.

SO, after reading about a hundred furniture painting tutorials, the hubs and I decided to dive in and do it. (I've never loved him more, than when he got fired up about an aqua china cabinet.) We debated about chalk paint or latex paint. I was worried about having to get wax in all those little grooves and details. So we went with latex.

After cleaning the whole thing with soapy water, and then allowing it to dry, we used Zinsser Bull's Eye 1-2-3 Primer. It's water based, and the surfaces don't have to be sanded first. It stuck really well, and I will definitely use this again.

For the paint, we chose Behr Premium Plus Ultra, in Lap Pool Blue, from Home Depot. Everything we used, was recommended from websites and blog posts that I read. (I'll link my favorites at the end.) We used two coats, and still have at least half a gallon of paint left. Our littlest man wanted to help, so I let him paint the back of one of the corner pieces. I had him paint his name too!
After everything was painted and dried came my favorite part - distressing it. I sanded the edges and corners and spots on the doors. It's weird how fun it was to basically destroy all my hard work. I love the way some of the primer shows through, and then the dark lovely wood. 

We really debated about whether or not to take the hardware off before we started painting. I was terrified that it wouldn't go back on properly, but my husband was brave and took control of that situation. I painted the hardware with Rustoleum Hammered spray paint. It actually left a hammered metal texture to it - I have no idea how that works, but it looks great. (I sprayed WAY too much though, and it took forever to dry!)

These were the handles before we removed them. When we reassembled it, we left off the extra detail pieces. 


In this picture, you can see the hammered texture of the painted hardware.


The biggest debate was a finishing coat. We bought Minwax Polycrylic, and then I read some blog posts that scared me - they talked about brush strokes and bubbles and I was afraid we'd ruin all our work. I applied Polycrylic to the cabinet doors, decided I didn't like it, sanded it off, and the repainted and redistressed the doors. This cabinet doesn't get a lot of wear and tear, so we're just leaving it without.
So there you have it. Meet the happy, cheery, aqua china cabinet! It has really brightened up our whole living area. I asked my husband how long it will be until we say "Remember when it was so trendy to have aqua furniture?" Who knows how many colors this sweet old cabinet will end up being! My dream is that some day I'll have a craft room, and this can be part of my storage space. Can't you just picture it filled with jars of buttons and twine!? (Swooooon.) 


Here are some of the blogs that helped us:
Whatever (this is the post that got me fired up. COLOR. COLOR. COLOR. and craft supplies!)

In addition, I pinned a lot of tutorials on Pinterest, as well as examples that inspired us.

And now, if you haven't had enough of me, stop on by the Paper Crafts & Scrapbooking blog, because I took an unused shelf from this cabinet, and turned it into a piece of artwork, thanks to Hazel & Ruby stencils! Come on over and see! Thanks for listening to me ramble on today. Holler if you have any questions! :) 

Sunday, November 16, 2014

This week. {Paper Crafts & Scrapbooking magazine}

I just recently sent this card to someone I adore an awful lot. I hope it brightened her day! 


It's been a WEEK, friends. Seriously. The paper crafting world is reeling from the news that Paper Crafts & Scrapbooking is ceasing publication. It's amazing how a magazine has drawn people together, created friendships and connections and been such a huge life changer for so many people. Sweet, crafty folks like you and me (well, I'm sweet MOST days) have been changed. We've had an outlet for our creativity. It made our hobby feel LEGIT - didn't it? People who don't craft, don't really GET us sometimes. But when we say, "Yeah, I create stuff that's been in magazines." Well - they GET that. When I started submitting, I just thought it would be cool to see my name and artwork in print. And it is seriously cool. The novelty has never worn off. I didn't expect that I'd make friends all over the world, participate in blog hops, work with amazing designers, and companies, and even get to sit in THE office at Paper Crafts & Scrapbooking. Being a Go-to Gal wasn't even something in my realm of dreams, but it taught be to dream a bit bigger though! 

It hasn't been all sunshine and rainbows. Behind the scenes of the magazine, there is WORK. Occasionally, there are tears and private hissy fits. There are projects that are redone (and sometimes redone again) and sometimes they are thrown in the garbage. There are last minute deadlines and phone meetings and schedules to keep. We had fun beyond words, and we laughed like crazy people, but it wasn't always easy. We worked our tails off, especially the editors and staff, to create a magazine that would inspire, and educate. It's hard to understand that one day we're all cranking along and working on the June issue . . .and then, well . . . .we're not. 

Some have voiced their strong opinions and frustrations about this week's news. But please, be kind. . . .please remember there are a lovely, talented, and tireless group of people who lost their full time JOBS in this situation. Whether you felt sunshine and roses about the magazine or not - people have worked their TAILS off to create it. We've poured our hearts and souls into it - and there's a lot more that goes on behind the scenes than I even understand. So think before you type. Be kind. On the flip side, there have been so many kind words. We've been comforted by our stories and memories and connections, haven't we?!

I'm feeling a little lost this week, as I know a lot of us are. My calendar was mostly wiped clean, and I've just looked at my desk wondering what in the world to do with myself. This was sudden - it wasn't something any of us were expecting, and it's going to take a while for the new normal to set in. The good news is - we're all still connected by social media and blogs, so let's work together to maintain the crafty, creative connections we have. And hey - maybe I'll spend some more time blogging now. Thank you sweet friends, stay crafty!!! I'd love to hear your thoughts and favorite things about the magazine if you feel like sharing! xoxo

Card details: I used Elle's Studio Shine Collection and Shine journaling cards. (affiliate links) This collection is so bright and cheery! I love it! 

Tuesday, October 28, 2014

Go-to Gal Designer Challenge {Stampin' Up!}

Hello friends! It's a Go-to Gals Designer Challenge Day, and we're using some Stampin' Up! goodness today. When I saw this stamp set, The Newborn King, in the 2014 Holiday Catalog, I immediately saw so many fun possibilities for watercolors, paper-piecing, and chalking with this stamp set. On today's card, I embossed the images in white, and then watercolored over top, using an emboss resist technique. The premise of emboss resist, is that the embossed area will resist the color you place over top. I especially love using white embossing with a resist technique because the bright colors really make the lines pop.

And here's the actual stamp set image. . . isn't that just gorgeous? I'm excited to try out some other techniques with this set.

The other Paper Crafts & Scrapbooking Go-to Gals are sharing some fabulous Stampin' Up! projects today too. I can't wait to see what they've been working on! Be sure to bop around and check it out!

Thanks so much for coming by! xoxo

Wednesday, October 8, 2014

Frightful and Delightful {Paper Crafts & Scrapbooking magazine}


Hey there friends! I'm sharing some frightful and delightful Halloween inspiration over on the Paper Crafts & Scrapbooking magazine blog today! And as I promised over there, here are a few addition photos, plus all the supplies I used. If you haven't stopped over there yet, I'd love for you to come by and read about how I inspired myself and jazzed up my creativity - without even a trip to Pinterest! (I wasn't sure it was possible!)

SUPPLIES: (some affiliate links included)
-Gift bags - Target Dollar Spot (part of the Halloween goodies!)
-Close To My Heart Paper Fundamentals Basics Assortment black chevron, gray hexagon print paper (I love this paper. Each color is paired with white and a pattern on one side, and solid colored with shiny texture on the other side. They're so versatile!)
-Close To My Heart Scaredy Cat paper pack 
-Winnie & Walter Moonlight stamp set (all stamps used are from this great set!)


Thanks so much for stopping by today! xoxo

Wednesday, September 24, 2014

October Mini Cards on GTG Designer Challenge Day! {Winnie & Walter}


Hello friends! It's Go-to Gal Designer Challenge day, and today the GTGs are sharing our love of Winnie & Walter. This is one of my favorite new stamp companies. Their clear stamps are made in the USA (and that means they're great quality!) I've been crafting up a storm with their new set, called Moonlight. It's a 6x8 stamp set, with FOURTY FOUR stamps. Seriously - you can craft your Halloween FACE off with this set.
Today I'd like to share five mini 3x3 cards that I made, showing off the versatility of this set. I thought about some of the most common card making styles, as well as some Halloween themes and created a card for each. I've got a card for just about everyone, even a non-Halloween card! So let's get to it, before you get bored! 

This first mini card is my spoooooooky card. My boys love this one!

Next up, we'll call this "classy and elegant" - is that possible on a Halloween card? That spiderweb border is REALLY cool, isn't it?

And this, I'll admit is my favorite - the cute and fun mini card.

Next on the list, clean and graphic. Simple stamping and bold black and white.

And last but definitely not least - for autumn, a non-Halloween card. I stamped and masked the pumpkins and then watercolored over them. So simple, and so lovely!

Thanks so much for stopping by today. Go and visit my Go-to girlies, and see what they've created for today! I can't wait to bop around and check them out too! And then stop by and visit Winnie & Walter. You can check out their website, their blog, and their Facebook page to stay up to date with this fab company!

And now. . . .GO!

Wednesday, August 27, 2014

Go-to Gal Designer Challenge {Tsukineko/IMAGINE Crafts}


Good day, sweet crafty friends!It's Go-to Gal Designer Challenge day! This is a just-for-fun challenge that the Paper Crafts & Scrapbooking magazine Go-to Gals toss out to each other, using some of our favorite products. This month we are playing with Tsukineko/IMAGINE Crafts products. If you hoard ink, then you probably have some of their great products in your stash. Tsukineko/IMAGINE Crafts makes VersaMagic, VersaFine, Memento and StazOn . . .just to name a FEW! I'll be honest, I had never really used a chalk ink until Tsukineko came into my life! And I've never crafted the same again! :)


For today's project, I had some brand new Stampin' Up stamps looking adoringly at me (Fall Fest and For All Things), just begging to be inked up. It still feels quite far from autumn around here, so I thought I'd do something different, and use some not-quite traditional colors on my pumpkins. I used Tsukineko/IMAGINE Crafts' VersaMagic inks in Pixie Dust, Pink Grapefruit, Mango Madness, plus Key Lime for the leaves and stems. The small Dew Drop sized ink pads are perfect for a project like this, because I was able to ink up the stamps with two colors, to create my green stems, all in one step. 


I paired my sweet pumpkins with Avery Elle woodgrain cardstock. (We discussed this in my last blog post. . .and here it is again, because I'm telling you - I LOVE this cardstock!) I also added my favorite May Arts twine, plus a wood embellishment from Close To My Heart. 

So, here's my not-quite-ready-for-fall, fall card. I am excited to see what the other Go-to Gals are up to, with their Tsukineko/IMAGINE Crafts products. They aren't just YOUR Go-to Gals. . .they are MINE too, and I am seriously turning to them for help, inspiration, and chit chat EVERY day. They're the best. So go see them, and give my Gals some love! 

Thanks so much for stopping by!!!! Have a fabulous day!

Wednesday, August 20, 2014

It's beginning to look at lot like Christmas? {Paper Crafts & Scrapbooking magazine}

I'm on the Paper Crafts & Scrapbooking magazine blog today, welcoming a new issue! Holiday Cards & More, Volume 9 is a print issue, on newsstands now, and it is full of holiday inspiration! If you didn't come from there, please pop on over to the blog and visit! I've shared some lovely holiday tags and then I created my own non-holiday tags from that inspiration - just to prove that this is a pretty must-have issue, even if you aren't quite ready for winter crafting!


And I have one little holiday project for you here today, PLUS a chance to win. . . .read on, my crafty friends!

I created this card with some sweet products from the Timbergrove Collection by Fancy Pants Designs. The burlap bow, also from Fancy Pants, is such a great product. It comes just like you see it, already shaped and ready to stick on a project. I love the way it brought this whole card together. I am work on my layering skills - putting product together, and actually USING all of the stickers, tags, and fun embellishments I have so this card was good practice!

And now, because we are celebrating a new magazine, in addition to the copy I'm giving away on the Paper Crafts & Scrapbooking blog, I have one more issue to give away here! So, leave a comment - I'd love to know: Do you create Christmas/holiday cards? If so, how early you start working on them? I'll draw one random commenter to win Holiday Cards & More, on Saturday August 23rd! Thanks so much for stopping by!

Card supplies:
Fancy Pants Designs Timbergrove Small Decorative Tags
Fancy Pants Designs Timbergrove Patterned Photo Frames
Fancy Pants Designs Timbergrove 12x12 Paper Kit
Fancy Pants Designs Artist Edition Collection Burlap Bow

Friday, August 15, 2014

A Fond Farewell


Today's card was created with someone very special in mind. It's the lovely Betsy Veldman. I completely love this woman. She is kind-hearted, and her creativity always inspires me. Her good humor and laughter is contagious, and she is just a really fun person to be with. Her artwork is gorgeous, and her attention to detail is impeccable.

I created this card based on one of my favorite recent blog posts that Betsy shared at the Paper Crafts & Scrapbooking blog. It's all about the trendiness of bright colors, with a pop of black and white. I really love bright colors, with black and white, so I was completely inspired!

Betsy has decided it's time to move on from the Go-to Gals and her position at the magazine, so the 6 of us decided to give her a Bon Voyage blog hop, to share our love.  We'll miss her in a major way. It's silly how much I'll miss her - she lives in Iowa, and I live in Florida. It's not like we meet up for coffee every week. She is just as easy to text, email, and chat with as she's always been. I have to keep reminding myself of this, because somehow she feels like she'll be farther away. {I love you Betsy!!!!}

Will you stop by and visit all the Go-to Gal blogs today, and check out our Betsy-inspired cards? And then stop by and see Betsy too, and give her some love!


    Want to know more about today's card? I used some brand new and well-loved Technique Tuesday products. The new Cool Tab Card die is going to be a great die in my stash. The Story Card dies are great for journaling cards, and scrapbooking projects, but they are just as terrific for card bases too. I also used a brand new sentiment, from the You're So Sweet stamp set. It's a mini set, and it has four beautiful, and practical sentiments! The poppies are from Poppy Sentiments, which has great flowers for paper-piecing and coloring, plus really usable but unique sentiments.

     Card supplies:
     Technique Tuesday stamps and dies-
     Fancy Pants Designs Park Bench patterned paper

    Thanks so much for stopping by today! My kids head off to school next week, and I have big plans for getting my life organized and getting some work done! (We'll see how that goes!) Have a great weekend! xoxo


Wednesday, July 30, 2014

ThankFUL Go-to Gal Designer Challenge {Hazel & Ruby}

It's Go-to Gal Designer Challenge Day!!!! The Gals and I are sharing projects from a FABULOUS hip, new company called Hazel & Ruby. It was so fun to visit Hazel & Ruby with the Paper Crafts & Scrapbooking chickies in April. We got to see sneak peeks of NEW product that's being released right NOW, which was pretty cool! (You can see the new Summer 2014 release on this Hazel & Ruby blog post.)

(Here we are, working on a little Make-n-take project in the Hazel & Ruby office!)

When I got home I was fired up to try out some of the stencils and papers that Hazel & Ruby shared with us. I wasn't quite brave enough yet to start with a canvas or home decor project, but this card was the perfect way to try out the stencils. (And now that I've done it, and I see how easy it is, I'm TOTALLY ready to create a wallhanging!)

To start out, I trimmed some Wrap It Up lightweight paper, and adhered it to a card base. Then I peeled off the letters I wanted from the Greetings Phrases stencil mask, and stuck them on. They adhere perfectly, but they come off easily too, and they're reusable!

Next, I used white acrylic paint and brushed it over the top. When the paint was dry, I carefully pulled up the stencils. It turned out pretty well for my first shot!


I can't wait to check out what my other Go-to pals have created! Thanks so much for stopping by today! Will you also visit Hazel & Ruby at their website, blog, and/or Facebook page? Tell them the Go-to Gals sent ya! 

PS I just noticed that scrapbook.com is offering 20% off Hazel & Ruby products - today only! Click on the links above to go straight to my supplies. Put items in your cart and the 20% will be automatically deducted! No coupon code necessary! 

Wednesday, July 9, 2014

A Fancy Go-to Gal Designer Challenge {Fancy Pants Designs}


It's not exactly the last Wednesday of the month, but we're having a fun little off-schedule Go-to Gals Designer Challenge today! The Paper Crafts &Scrapbooking magazine Go-to Gals have ourselves a friendly little monthly challenge, and today we get to share what we created!

This month we're using goodies from Fancy Pants Designs. I've raved about Fancy Pants a time or two lately. We even got to visit the warehouse, during our editorial board meetings in Utah. (You can read about it and see another card, HERE.)

I promised I'd share the card we made during our visit, and today seems like the perfect day to do just that! I used the lovely new Burlap and Bouquets collection on this card. The colors are so sweet and soft, but the pops of bright shades, and black give this collection a lot of personality! I have been using it like CRAZY.


Fancy Pants Designs creates so many fun embellishments and unique elements to add to cards, layouts, and decor projects. The library cards, assorted sizes of tags, envelopes, flair, and die cuts are such fun to pull together and create with. 

Next up is a card that I combined more Burlap & Bouquets paper, along with stamps from The Stamps of Life. The chalkboard sentiments from chalksayings2stamp flowed so well with these papers, and I love the soft colors against the bold black. This card would be easy to mass-produce using a variety of papers too! 

I can't wait to see what the other Go-to Gals have created with Fancy Pants this month! Please head around and visit them, and leave them some love, okay!? Thanks a bunch for stopping by today! xoxo

Card supplies: