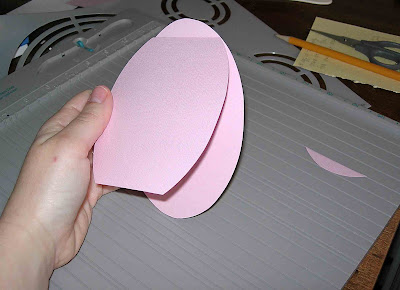
To create my card, I used an oval template. Believe it or not, I have NO diecutting system, no circle cutter, oval cutter, or any other fancy tool. Just a template. (This one happens to be from CTMH.) My oval is about 4x5.5, so it will fit in a standard invitation size envelope. To get started, I traced TWO matching ovals and cut them out. One will be the front, and one will be the back of the card.

On my Scor-Pal, (which, by the way is SUCH a great invention. I don't use it often, but every time I do, I think to myself "I should use this thing more often!") I scored TWO lines. One at the 5, and one at the .5

On one of those score-lines, use scissors or a paper trimmer to CUT the edge of your oval off. Fold the other one. (The flat side will be where your card rests on the table. The folded one is where we attach the two pieces together)

Apply adhesive to the fold, line up your two ovals and adhere them together. Line them up the best you can, but you can go back and trim from the card front, if they aren't quite perfect, once your newly formed card is closed.
I said yesterday, there is definitely more than one way to do this. I'm not sure this is the BEST way, but it worked. If you come up with a different method, I would love to hear about it!!! And if you make an oval card, link it up! I wanna see it!!! :)
I have two more oval cards to share, but you'll have to wait a few more days until the stamps are released!!! :) Here's one more view of the card I shared yesterday, which shows the back a little bit better. I hope this all made sense. . . if you're confused, let me know, and I'm happy to help ya out!
Have a great day!
XOXO


2 comments:
This is pretty clever. I would not have thought to cut the bottom of the oval on the back to allow it to stand. This is an adorable card, and I think I will have to give it a shot.
Ohh I love it.
I wish I sent out Easter cards.
Post a Comment