Hello crafty friends! Have you ever made a handmade tunnel card? Making handmade cards that are dimensional and interactive has become so popular! There are pop up cards and slider cards and cards in all sorts of shapes. I was fascinated by the depth and possibilities of a tunnel card, so I started playing around and making them.
I think an ocean scene is perfect for a tunnel card, because there's lots of fun sea life to layer together. Let's dive in and take a look!
This blog post contains affiliate links. When you shop through my links, I may receive compensation at no cost to you. Thank you from the bottom of my crafty heart!
Here's how to get started on this card:
- Trim cardstock pieces to fit card front (5.5x4.25) For this card, you'll need four pieces - one kraft, and three shades of teal.
- First we'll die cut a circle from each piece, starting with the largest. Begining with the largest circle, allows us to line each smaller circle up properly. Cut the largest circle from kraft cardstock, then lay the kraft panel over the next layer (light aqua) as shown. See how I've lined up the next circle die in the center of the opening? Tape die in place and cut. (photo below)
- Next, we'll repeat the process. Line up the light aqua with the next layer, and use the opening to line up the third circle die. (photo below)
- After cutting the third circle, layer all the pieces together and now you can really see the layout of the card. All of these layers will be attached to your card base.
- As you consider adhering these layers together, you have some options. You can use foam adhesive and just layer all your pieces together, or you can do some more die cutting. Below you'll see what I did. Using three foam sheets, die cut a circle from each. (I used a die slightly larger than the kraft circle, so there would be no visible edges.) Then adhere the layers together, using your adhesive of choice. TIP: Using foam sheets is also a great way to get the dimension you need for a shaker card!
Next comes the FUN part - decorate your card! Use stamped and/or die cut images to create a scene. Tuck them between the layers, and use foam adhesive to create even more variety in depths.
Think about how many layers you want to use, and what shape tunnel you'd like to use. Here are some more ideas to inspire you!
This card features stamps from Spellbinders. I paired it with an embossing folder on two of the layers, which adds some fun texture.
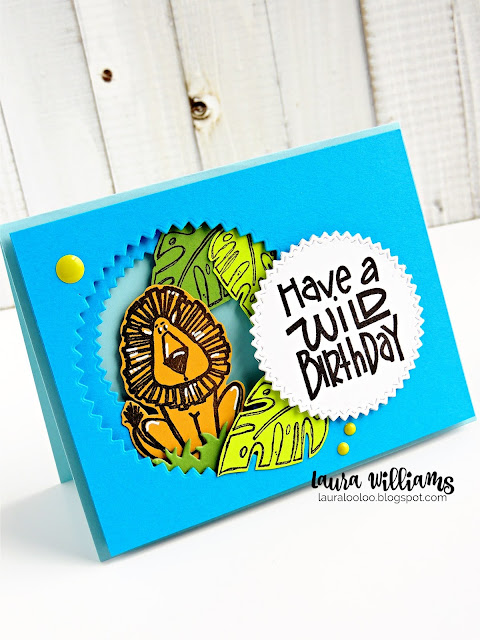
Here's one last idea, one that doesn't feature an under water scene. Dies with detailed edges add fun personality to tunnel cards. This jungle card uses pinked-edge circle dies instead of oval dies.
I hope you have LOTS OF FUN creating your own handmade tunnel cards. Once you get started, you'll think of so many creative ideas to try! I'm so glad you stopped by today! Let's connect again - subscribe so you don't miss a blog post!
I love using the Magic Mat with my die cutting machine, because it alleviates those pesky cutting lines on the underneath side of die cut shapes. You know, the ones from your best used cutting plates?
Shop all the Magic Mat sizes here
Looking for more fishies inspiration? Here's one more!


27 comments:
Pretty cards and lovely coloring! That Tunnel Card is everything!!!
I am in love with the colors on your second card, looks perfect! The first card is stunning with the way you framed out the sentiment and made the underwater scene around the frame!
Cute underwater scenes! Love the depth and style of the first card especially!
These are cute. :)
So adorable! Awesome works as always !
LOVE this Fish Stamp Set! SO MANY CUTE IMAGES in the set! LOVE your card, Laura! I am thinking, FISHEY'S NOW! LOL ;)
Wonderful cards!!!
Love all the layers on your first card; beautifully designed. And the 2nd card is so pretty with your perfect BG and that sweet jelly!
Love the layering of the first card.
The backgrounds and then the
marine critters in the front - so
much dimension to the card.
thanks for sharing
txmlhl(at)yahoo(dot)com
Super cute sea creatures on these adorable cards!
I LOVE THIS SET! What great backgrounds you did! I love how you colored the creatures!
Good idea to use the embossing folder as water. Good way to stretch your tools.
Great card design with the fishies and I love the tunnel technique used for it.
Your underwater scene cards are so cute!
Nice cards, love the fishes!
Adorable cards!
Darling cards!
Adorable card and love the technique you showed for the tunnel effect.
Cute fish stamps too!
Both of these cards are great but I LOVE the 2nd card. The sentiment is so cute!!
love your cards - the frame on the first one is very creative:)
Such fantastic cards! Love the stamps and sentiments.
Thanks so much for sharing...
So cute! Tunnel cards are my recent obsession.
Great cards. I really like the tunnel card.
Great cards! Love the look of the first one but great sentiment on the second card!
Love the adorable sea critters!
Great cards! Thanks for sharing!
Adorable cards! I am partial to the jelly- such a cute design; great ocean background and so simple!
Post a Comment