Showing posts with label FSJ stamp of the month. Show all posts

Wednesday, April 1, 2020

Come and See the FSJ Stamp of the Month - Bold Beautiful {April 2020}

April 1st is here. Is anyone sure where March went? It seemed to last for twenty million days and the blink of an eye all at the same time. Time is weird isn't it? This quarantine business is brand new to us and sometimes our brains don't know what to do with it - and that's okay. But you know what helps? MAKING. Because makers gotta make. Let's do what we know and share some crafty love with those who we miss, and with those who are working so hard to help others. 


This blog post contains affiliate links. When you shop through my links I may receive compensation at no cost to you. Thank you from the bottom of my crafty heart!
The April 2020 Stamp of the Month includes beautiful images that are perfect for stamping backgrounds, wreaths, and design accents. The BEAUTIFUL sentiment makes a great focal point, and it fits inside the frame stamp which can be used in lots of different ways. 

I also love that this stamp set will be a great companion to other stamp sets. In fact, for my first card I snuck in a sentiment from the Spread Love stamp set. I stamped one of the floral images (it's kind of a corner shaped stamp) around the edge of a die cut circle and then layered some extra images on top along with the embossed sentiment. 

For my second card, I stamped some long vines across the aqua panel and added the sentiment and frame along with a fussy cut floral corner. I love the fresh cool feeling of the color palette on today's cards. I think it goes beautifully with this stamp set. Would you like to see more ideas with Bold Beautiful? Stop by the Spellbinders website for gorgeous examples, plus all the details on the Stamp of the Month Club.

I'm so grateful that you stopped by today. Was this your first time here? I'd love to connect again. Follow me on Facebook, Instagram, and Pinterest where I'm sharing crafty goodness all week long. xoxo

Supplies on Today's Cards:
Bold Beautiful Stamp Set (March 2020)
Spread Love stamp set 
Spread Love die set

Friday, March 6, 2020

Make a Clean and Simple Card Set With Patterned Papers

I have found that a simple set of handmade cards is almost always a welcome gift. This a good thing - because making handmade cards is kind of my jam, (duh) plus I have more cards and supplies than I can use in my lifetime. It feels good to use the pretty paper I have stashed, and to knock out a whole stack of cards. Therefore, let's look at an easy idea for clean and simple handmade cards for any occasion - using any sentiment - with any (and all) paper you have. Ready?

This blog post contains affiliate links. When you shop through my links I may receive compensation at no cost to you. Thank you from the bottom of my crafty heart!


Let's start by talking about the layout of today's cards. There are lots of ways you can customize this idea and make it your own, but begin with these ideas:

  • Cut and fold colored card bases from cardstock. (TIP: I like to do this all at once because it makes the assembly process faster and easier.)
  • Trim patterned papers and white cardstock into 4x5.25 blocks. 
  • Then, lay each block of patterned paper onto the trimmer and cut it diagonally into two pieces. Play with the angle and go for it - there's no right or wrong way.
  • Adhere patterned paper onto white cardstock. Remember the two angled pieces you cut from each panel of patterned paper? This will make two cards. Depending on the print, some pieces may be better suited as the top of the card or the bottom. (Basically if the print can't be turned upside down, like the coffee cups below, one card will have the print at the top left and the other at the bottom right. Have I confused you yet? Look at the coffee cards below. You with me?
  • Round one corner of the panel and adhere to the card base. Round the matching corner of the card too. 
  • Then, simply stamp a sentiment along the angled line, adhere a strip of washi tape, and add some finishing touches, like enamel dots, sequins etc. 

Whatever type of card you like to mass-produce, this simple layout will work perfectly. And because the layout is the same, even if you're using different sentiments and different papers, this idea will make a cohesive card set because of the design consistency. For these cards, I used a versatile and fun new stamp set called Sentiment Stacks. It's the March 2020 Stamp of the Month from FSJ + Spellbinders, and I know I'll be using this stamp set ALL the time. Stop by the Spellbinders website for all the details and learn how you can join the Stamp of the Month Club.
I love the way this house card turned out. I made the angle a bit steeper on this one because I followed the line of the rooftops. It was fun to play with different sentiments and different papers to bring these cards together. Below is one last idea, a more masculine version with gorgeous leafy patterned paper.

I hope this idea will inspire you the next time you're looking to crank out a whole set of quick handmade cards. Thanks so much for stopping by!

Was this your first time here? Let's connect againFollow me on Facebook, Instagram, and Pinterest where I'm sharing crafty goodness all week long

Supplies on today's cards:
FSJ Sentiment Stacks Stamp Set (March 2020 Stamp of the Month)
Sunday Adventure Prints  (coffee cup and floral prints)
RSVP Prints (leafy print)
Create and Bloom Prints (houses)

Looking for more card set ideas? 


Saturday, February 1, 2020

Say hello to Spring In the Desert, the FSJ Stamp of the Month! {February 2020}

February 1st brings us the latest Stamp of the Month from FSJ + Spellbinders, and it is a BEAUTY. Spring in the Desert is a red rubber stamp set filled with beautiful succulent and floral images. For today's cards I paired these stamps with some MEGA WATT bright colors, using Jane Davenport Colorsticks. Let's take a look at these two COLORFUL cards. 

This blog post contains affiliate links. When you shop through my links I may receive compensation at no cost to you. Thank you from the bottom of my crafty heart!
For the first card I made, I stamped a background using a few of the floral and succulent images. Then I went a little crazy with the Colorsticks, and added some scribbly color onto my card. Ever used Jane's Colorsticks? They have the texture of pastels, but they're water soluble - which means you can brush over them, and the color will blend and liquify - but not completely. So you're still left with bold colors and scribbles, but the colors will all sort of wash into each other too. It's such a beautiful effect, and they're such fun to play with. 

On my second card, I went clean and simple. A few scribbles across cardstock, a swipe of water, and then simple stamped floral images. I absolutely LOVE this simple layout - so much so, that you might be seeing some similar cards coming soon! 
 Have you ever checked out the FSJ Stamp of the Month? Each month we produce a brand new red rubber stamp set that arrives at your mailbox ready for some crafty fun.

If you LOVE this stamp set and you're not a member of the Spellbinders + FSJ Stamp of the Month club, go check out the details - and find lots more inspiration with Spring In the Desert. 

(Oh, and did I mention that club members get exclusive discounts in the Spellbinders + FSJ shop too!?) Sorry-not-sorry!


Supplies:
Jane Davenport ColorSticks - at scrapbook.com
* Colorsticks have been discontinued, but Gelatos will work similarly. I love those too! Check Gelatos out here!


Looking for more projects featuring Jane Davenport Colorsticks? 
Click the title below each image to learn about each project. 


Wednesday, January 1, 2020

Come See the FSJ January 2020 Stamp of the Month - Hugs Enclosed

Oh crafty friends, today I have some cards to share, featuring a stamp set called Hugs Enclosed, that makes the cutest Valentine cards, but I know we'll use it all year long too.

If you love mail (well DUH, don't we all - except the bills!) you'll love the little postage stamp and envelope images. There are sweet sentiments and some darling little friends (snail mail anyone?) Let's take a look at a few cards I made with this stamp set, and then you can pop on over to the Spellbinders + FSJ website and check out the stamp set in the shop. 

This blog post contains affiliate links. When you shop through my links I may receive compensation at no cost to you. Thank you from the bottom of my crafty heart!
 For the first card, I used a collection of the smallest images. I used one of my favorite little tips with small stamps. Put multiple stamps together onto a block, as close together as they'll fit. Play with the arrangement - and then stamp repeatedly onto cardstock. You can fill a whole card front quickly and easily, and you only have to line everything up once, instead of the tedious chore of lining up a million little images one at a time. To keep this background from being too distracting, I added a sheet of vellum stapled on top.
Next, I used some paper scraps from the Follow Your Heart 6x6 paper pack to make a Valentine in one of my favorite crisp and bright color schemes - red, black and white! Check out how perfectly the postage stamp die  coordinates with this stamp set! Yay for happy mail!

And last but not least, meet one of the cute friends in this stamp set. Snail mail! So fun! I gave this snail a VERY rainbow shell with watercolor pencils. This patterned paper is from the Holiday Cheer Prints paper pack, and along with the postage stamp die, another PERFECT companion is the Mini Envelope die. (You guys...the tiny postage stamps in this set are even the right size to add to the die cut envelope! As if anything could possibly make that envelope cuter!?) 


Thank you so much for stopping by today - and hey HAPPY NEW YEAR!!! Wishing you a beautiful, and crafty new year. I'm grateful for your support and crafty friendship all year long! xoxo 

Supplies On Today's Cards:


Was this your first time here? Let's connect again!
Find me on Facebook, Instagramand PinterestPlus subscribe to my blog, right up there in the sidebar, so you never miss a post.

Sunday, December 1, 2019

Introducing the Oh-So-Adorable Penguin Waddle Stamp Set! {FSJ Stamp of the Month}

HELLO December! It's been a busy weekend around my little blog, and in my real world - I hope you've had a fabulous Thanksgiving weekend, and a successful kickoff to the holiday season! 

Today is December 1, which means its time to welcome a brand new (and adorable) stamp set to the FSJ Stamp of the Month Club. I'm pleased to introduce you to Penguin Waddle. These guys are ADORABLE and today I have three coordinating cards to share with you. They're all one-layer cards that you can create simply (no fussy-cutting!) without too many supplies and they all feature a fun technique. Let's take a look!

This blog post contains affiliate links. When you shop through my links I may receive compensation at no cost to you. Thank you from the bottom of my crafty heart!
To create these cards, start with a white card base. I like to work on my grid paper especially for this project because it's going to help us line things up. The photo below shows how we start. Run a length of Electric Tape (or washi tape) across the card. Use the lines on the grid paper to be sure it's straight. 
* I love FSJ's Electric Tape for projects like this because it's wider than regular washi, and it has a sticky-note texture to it. The surface is paper, not slick feeling and it pulls up easily. If you use washi, you may need a wide washi, or double the lengths to make it wider. 

Next, choose an ink color and sponge a bit of ink as shown, right up to the tape. The tape is going to mask off a straight line, giving our penguin a "floor" to stand on. (I used Summer Days for this card.) 
 I don't have a photo of the next step, but here's what you'll do:

  1. Pull up the tape and be impressed with the pretty inky blob you just made and the magical straight edge the tape created. Now, lay that tape back down, lined up along that straight edge (covering most of the inky blob.) Because now, you're going to ink the area ABOVE your "floor".
  2. Repeat the same process, but you want the ink to be lighter - so you may want to blot off some of the excess ink onto scrap paper first. You want there to be enough definition against the "floor". 
  3. Then, grab a stencil you love and lightly stencil over that same area in the same color (TIP: Be careful not to ink below your tape line.) The stenciling should be subtle enough to not overwhelm the area - as you decide which stencil to use and how dark to make it, think about which penguin you'll be adding to the scene and how it'll all interact together. 
  4. Next, remove the tape line and stamp the penguin and sentiment right on top. Add a few splatters of Silk, and some enamel dots and call it DONE. 
Here's how my yellow card turned out: 

Then I decided to give a few more stencils and colors a try. Let's take a look at these. The blue one (Cool Pool ink) is pretty much the same as the yellow card. I used the Splash Zone stencil and I love the way the pattern overlaps just slightly onto the penguin's belly. 
 For the last card, I added the stenciling a little differently. I knew I didn't want too much overlap of the stencils onto the penguins, so I made the inked it darker around the edges and allowed it to fade towards the center (basically the opposite of the blue card.) It's fun to play with this idea but alter it slightly to accommodate your stencil, color, and image.
I did sneak one little extra piece onto my pink card - I fussy cut the cute bow onto pink cardstock and added it onto my card. But that's the only layer or fussy cutting for today!

I'm so grateful you stopped by today. There's been lots of craftiness here on my blog this weekend, as well as some AMAZING Black Friday sales. Be sure to scroll back through the past couple posts because those sales are still going on today!

Supplies on Today's Projects:
All of the supplies below are ON SALE right now! 
Licorice Twist Twine (not used but shown in photos)

Seriously - don't miss the amazing Black Friday Blowout Bash at Spellbinders + Fun Stampers Journey. (Hurry - it ends on December 3rd!) The deals are absolutely awesome. Pretty much ALL of my favorite things are on sale. I've been sharing a lot of my favorite products on Facebook this week. 


Friday, November 1, 2019

Introducing Mistletoe & Holly, the FSJ Stamp of the Month {November 2019}

I'm really quite unclear where October went but suddenly we've found ourselves in November. The days keep spinning by, and I think today marks the official "Oh my gosh, it's almost Thanksgiving and Christmas and the holiday chaos and fun are pretty much upon us." You know - the realization that strikes pure joy mixed with pure terror all at once. (Are ya with me?!) The good news is - today means a brand new Stamp of the Month set from FSJ, and it will FILL your heart with holiday spirit and joy. It is absolutely darling - so without further ado, please meet Mistletoe and Holly. 

This post contains affiliate links. When you shop through my links I may receive compensation at no cost to you. Thank you from the bottom of my crafty heart!
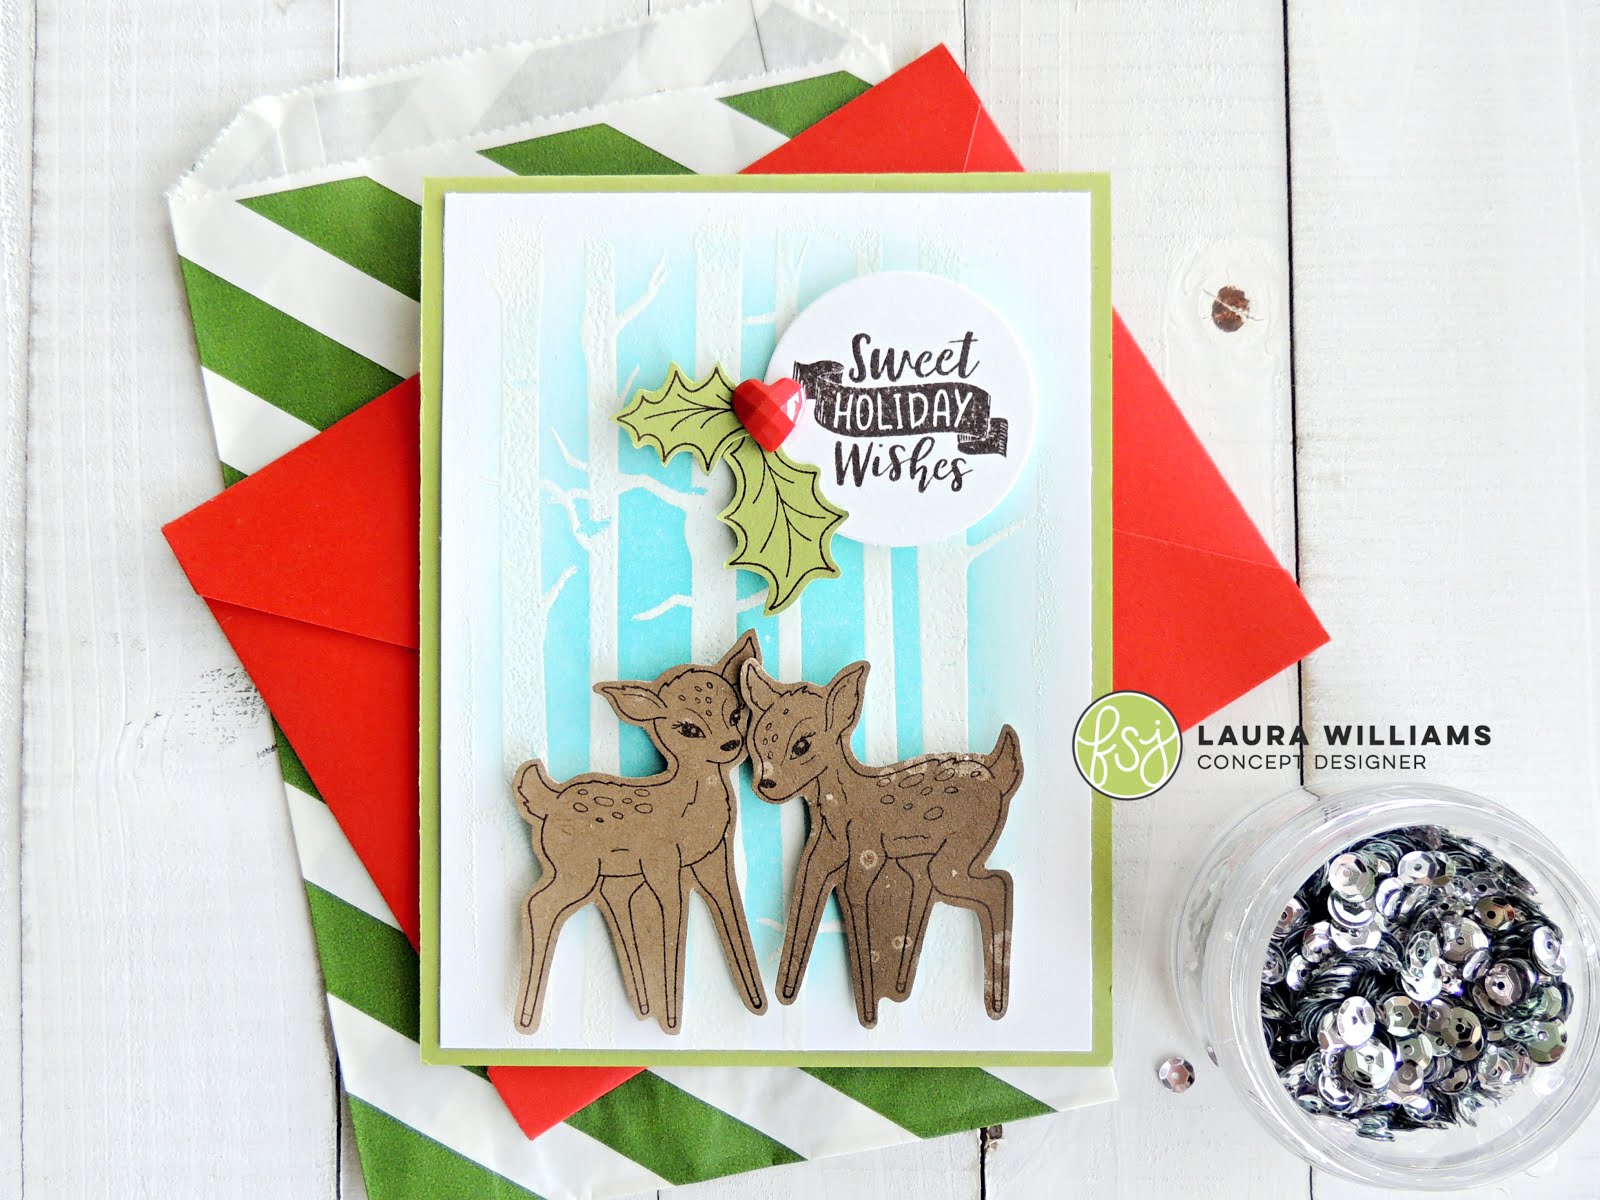
There's a brand new Stamp of the Month set from FSJ, and it will FILL your heart with holiday spirit and joy. It is absolutely darling - so without further ado, please meet Mistletoe and Holly. I'm in LOVE with these sweet deer. This month's stamp set includes the two deer, lots of holly and some sweet sentiments. There's plenty of opportunity to mix and match this set with some of your favorite dies and holiday stamps, and you'll have such fun creating holiday projects. #christmascard
I'm in LOVE with these sweet deer. This month's stamp set includes the two deer, lots of holly and some sweet sentiments. There's plenty of opportunity to mix and match this set with some of your favorite dies and holiday stamps, and you'll have such fun creating holiday projects. 
To create the background on this first card, start with a white cardstock panel. Stamp and heat emboss the Birch Trees background stamp in white embossing powder. (Yep, white on white.) Then sponge some Pool Play or Cool Pool ink gently onto the background in a circular motion, beginning in the middle and fading out towards the edges. Isn't it a snowy dreamy background? 

For my reindeer, I brayered just a little brown ink onto the Gel Press, splattered some Sparkle Silk, and then pulled a print onto Oatmeal Cookie cardstock. Then I stamped the reindeer and trimmed them. It added just a hint of color variation and I love the way the Sparkle Silk makes little spots. 
On the next reindeer, I added a bit of white colored pencil to add highlights and definition. 

HERE'S A TIP: See those bright red berries? Make faux enamel dots by hole-punching cardstock. Add Journey Glaze to them after attaching to the card. Perfectly matching dots for any project!
If you LOVE this stamp set and you're not a member of the Spellbinders + FSJ Stamp of the Month club, go check out the details - and find lots more inspiration with Mistletoe and Holly! Subscribing to this club means a brand new stamp set in your mailbox every month! (How FUN, right!?) But just in case there's a set you don't love, you can skip any time you want - easy peasy. Sometimes the SOTM becomes available later on, but often they sell out - and then you'll miss your chance! Stop by the website and find all the details, and look at some of the cute previous sets that we've offered in the past! 

(Oh, and did I mention that club members get exclusive discounts in the Spellbinders + FSJ shop too!?) Sorry-not-sorry!

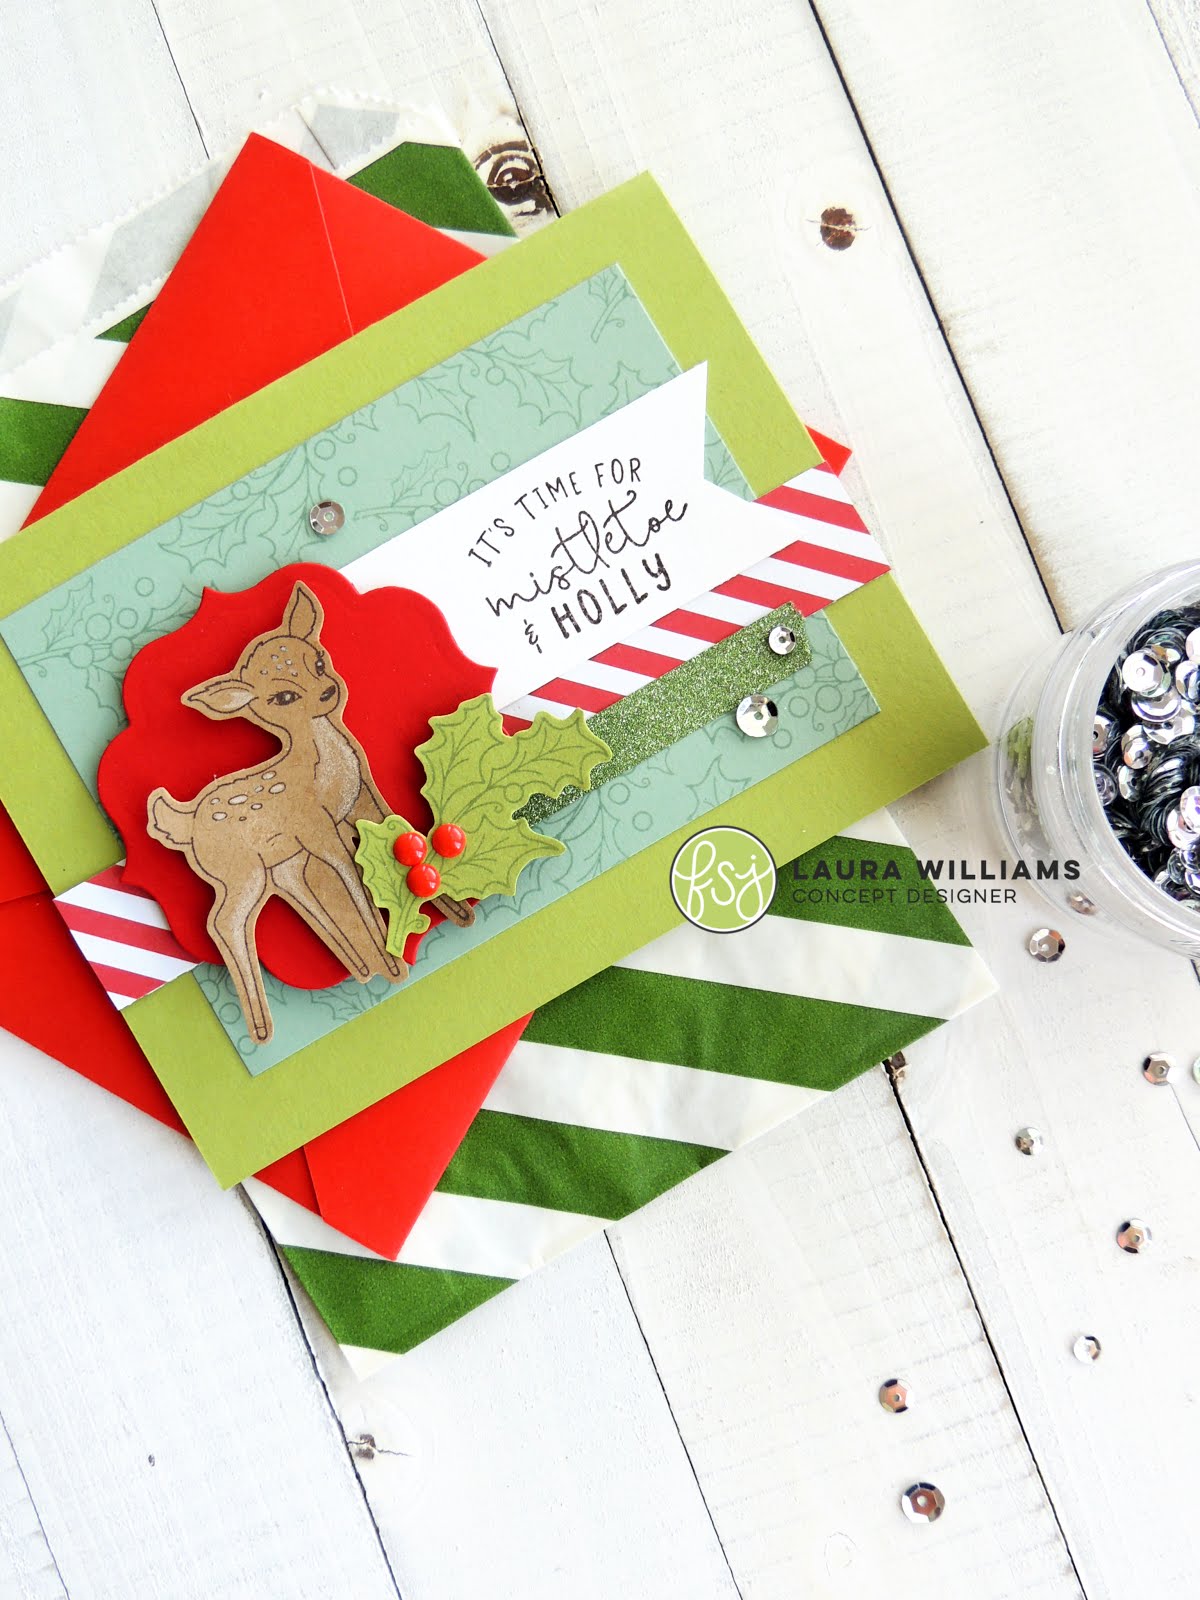
Before you go, can I sneak one more card idea in? Here's a card that requires no fussy cutting at all - just simple stamp and go, with quick little die cut holly leaves. 

Thanks so much for coming by today my friends - happy NOVEMBER. (Ack!!) As always, if you have questions about today's projects or products, always feel free to leave a comment! Have a BEAUTIFUL day! xoxo

Supplies used on today's card:

Tuesday, October 1, 2019

Introducing the FSJ October Stamp of the Month - Joyous Bird!

 Hello, my fine friends! It's time to say HELLO to a stunning and sweet Stamp of the Month from FSJ for October 2019. It's called Joyful Bird and it is just SO lovely! Joyous Bird is especially gorgeous for handmade Christmas cards, as well as cards all winter long. (Then again,  I know how creative you are - and I'm pretty sure you'll find a way to use this throughout the year too!) Ready to take a look?

This post contains affiliate links. When you shop through my links I may receive compensation at no cost to you. Thank you from the bottom of my crafty heart!
Joyous Bird includes this darling dove - he has sort of a folk art feel and he's totally sweet colorful or left black and white. If you hop on over to the Spellbinders + FSJ site, you'll see the most darling ideas and examples for this cutie! In addition to the dove, this red rubber stamp set includes a gorgeous star-snowflake, some great background-building images and of course sentiments to coordinate. (Plus two pieces of greenery/twigs!) Click here to see all the images in this stamp set. 


To recreate today's card, start with an embossed panel on a card base. Sponge ink over texture just on the center of the card. Next, add a die-cut frame. (TIP: Use any of your nesting style dies to make a frame, by die-cutting a larger shape, along with the next size down.) Then, stamp and detail cut the image for your scene. There are a lot of ways to arrange the dove along with the twig - and you'll see many different examples on the Stamp of the Month page for ideas! Finish off your card with a splatter of Silk and a few sequins, plus a simple sentiment.

 If you LOVE this stamp set and you're not a member of the Spellbinders + FSJ Stamp of the Month club, I hope you'll come check out all the details. Subscribing to this club means a brand new stamp set in your mailbox every month! (How FUN, right!?) But just in case there's a set you don't love, you can skip any time you want - easy peasy. Sometimes the SOTM becomes available later on, but often they sell out - and then you'll have missed your chance to grab it! Stop by the website and find all the details, and look at some of the cute previous sets that we've offered in the past! 

(Oh, and did I mention that club members get exclusive discounts in the Spellbinders + FSJ shop too!?) Sorry-not-sorry!

Thanks so much for coming by today my friends - if you have questions, always feel free to leave a comment! Have a BEAUTIFUL day! xoxo

Supplies used on today's card:


Sunday, September 1, 2019

Introducing: FSJ's September Stamp of the Month - Friendship Blessing

Hello friends and HAPPY SEPTEMBER! I'm so pleased to share Fun Stampers Journey's September Stamp of the Month, called Friendship Blessing. I am in love with this beautiful floral stamp set because the flowers are gorgeous, and they are a great size and they look amazing colored, or stamped onto colored paper or cardstock. This stamp set has a coordinating die set which means it's fast and simple to make a whole pile of beautiful flowers to assemble into a bouquet. On today's card I began with a little bit of simple Gel Press printing - let's take a look! 

This blog post contains affiliate links. If you shop through my links, I will receive compensation at no cost to you. Thank you from the bottom of my crafty heart!
One of my favorite ways to use the Gel Press is to print some sheets of cardstock with ink from one color family (like shades of yellows, pinks, greens etc.) and then use those prints as patterned paper or colored cardstock. To begin this card, I made a few Gel Press prints in the colors I wanted to use for the flowers. (I already had the green print, so that one was covered.) Then, I stamped the floral images onto the prints and die-cut them. I love the color variations and subtle details that make this card more interesting than if I simply stamped on solid cardstock. Even the aqua background panel is a Gel Press print. 

 Once the images were all die-cut, I started assembling my bouquet and added a stamped/die-cut sentiment plus a panel of Corrugated Stock for a bit more texture. You'll probably see bits and pieces of these prints showing up on other projects in the coming weeks!

Have you ever considered joining Spellbinders + FSJ's awesome monthly clubs? There are clubs for the Stamp of the Month, plus a card kit complete with stamps, accessories, paper and more. Plus, there are die-cutting clubs and a hot foil kit club. You can find all the details on the clubs offered HERE on the Spellbinders website.

Sometimes you can order a club product alacarte after the Club offers it - but frequently it sells out, so if you LOVE something . . .JOIN THE CLUB! You can cancel or skip a month at any time, so it's a great opportunity to get some crafty goodness in your mailbox every month! (Plus, as a club member you receive 10% off in the Spellbinders + FSJ store!) 

Card Supplies: FSJ - Journey Gel Press | Friendship Blessing Stamp of the Month | Re-Inkers - Haystack, Sweet Berry, Rich Coral, Limeade Splash, Lemongrass, Pumpkin Bread | Sparkle Silk | Dark Roast Silk | Golden Tansy Twine


Want to learn more about the Gel Press? 
(There's even a SUPER quick little video that will show you what it looks like to USE the Gel Press, if you haven't ever seen it in action! So.Much.Fun!)


Saturday, June 1, 2019

Introducing Sprinkled With Love, the June Stamp of the Month

Have you flipped your calendar to June yet? Are you desperate for a Venti coffee and a couple of donuts as you frantically drag your kids across the finish line of the school year? If you don't have kids at home, please send up all the happy thoughts for the mamas and dads of the world, (plus the hardworking teachers) because the final days are a blur of awards ceremonies, final projects, and hot messes. 

 I'll sit back with a great big iced coffee this morning, as my household celebrates our first day of summer vacation. We crossed the finish line and we want ALL the donuts. 

Speaking of donuts . . . .(did you like that transition?) I am loving the crafty-sweet calorie-free donuts in this month's Stamp of the Month from Fun Stampers Journey (plus the coordinating dies!) This month's stamp set is called Sprinkled With Love and it is adorable! It features not only donuts . . .but unicorns too! WHAT?! So fun. So magical. So perfectly adorable.

(This post contains affiliate links. When you shop through my links, I receive a small compensation at no cost to you. Thank you from the bottom of my crafty, donut-loving heart!)

On today's card I focused on the coordinating dies for Sprinkled with Love, and I paired them with the Coffee First die set. They go together so well - just like coffee and donuts!

Sprinkled With Love has a few different types of frosting to decorate the delicious donuts - and I chose this one that looks like a heart (A frosting heart!? How cute is that?!) I added some dimensional glaze and a sprinkling of glitter to finish it off. I used Sweet Candy Drops enamel dots to decorate the second donut.

Click here to see the sweet unicorn stamp that comes with these donuts. Also, be sure to check out the sentiments because they are equally adorable!! 

Would you like this stamp set and a new stamp set sent to your mailbox every single month, just like magic? Sign up for the FSJ Stamp of the Month Club and all your stamping dreams may come true! 


Wednesday, May 1, 2019

Meet the FSJ May 2019 Stamp of the Month - Natural Dreamer

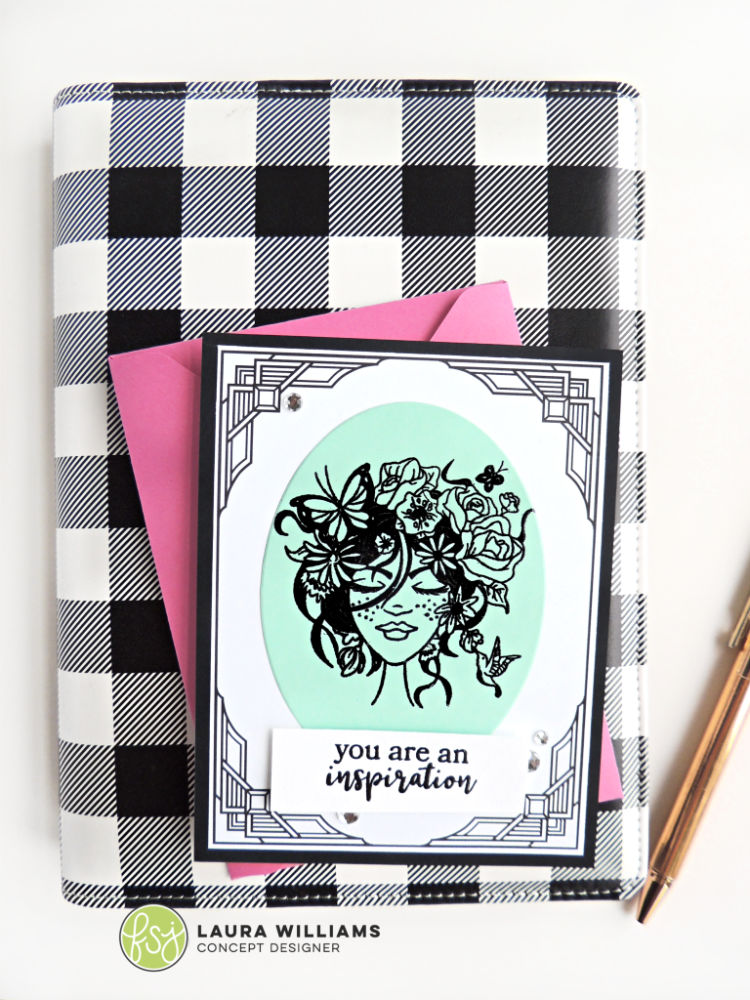
The month of May brings a new Stamp of the Month from Fun Stampers Journey. This month's stamp set is called Natural Dreamer and it has a fun but elegant boho chic feel. (Is that even a THING?) It's like . . .summer. and flowers. and relaxing. and swirly. and it looks absolutely AMAZING in black and white. (How's THAT for a description?) Let's look at the first card I made for you today. 
I can't STOP embossing the images and sentiments in this set. The sentiments are BEAUTIFUL. And did I mention it's so gorgeous in black and white? I got crazy on this one and embossed on Cool Pool. (Because. Cool. Pool.) I embossed the image, and then die cut an oval, then paired the whole thing with one of the cool printed papers from the RSVP collection. These printed frames are so pretty and easy to use. Just trim and adhere to a card. I love the way the Art Deco edges contrast with the flowy magical feel of the flower hair girl. 

And next, I embossed again - but for this card I used FSJ's Copper Embossing Powder, on Haystack cardstock. I made the background, by inking Blue Lagoon ink onto a stencil, and then splattering it generously with Gold Silk. 


The shine of the Copper embossing is really pretty on the Haystack cardstock. I really wasn't sure if that color combination would work, but I like it!

The FSJ Stamp of the Month Club is a fun way to get a brand new stamp set in your mailbox each month. It comes with full color inspiration, plus a video with tutorials, demos and ideas for the stamp set each month. I hope you'll stop by the FSJ website to check out all the details, plus you'll find more inspiration using the Natural Dreamer stamp set.