Showing posts with label the twinery. Show all posts

Thursday, February 26, 2015

A Week to "Die" For Day 3 {Winnie & Walter}


A Week to "Die" For . . .hahaha, doesn't it just kill you!? This week we are celebrating the newly released dies at Winnie & Walter. Today we're showcasing Big Bang Confetti Cutaways + The Party Confetti Cutaways. These two die sets make some pretty awesome accents for any kind of project. I've used the Big Bang Confetti dies on . . .well - all of the projects I've shared this week, so today I thought I'd focus on The Party Confetti Cutaways, combined with sentiments from the In A Word dies, and tag from Essentials: Katharine Cutaways.  These are fun and easy birthday cards to create, which could be duplicated in any color combination you'd like! 
Do you remember what I shared yesterday about creating visual triangles with colors and shapes on your cards, especially with confetti? Take a look at both of these cards and see if you can find some visual triangles on these too! 

You know the drill. . . head on over to the Winnie & Walter blog for lots of inspiration, my friends! We've got one more day to party together, Winnie & Walter style - so TOMORROW: same time, same place! xoxo

Sunday, July 20, 2014

mini strawberry garland {The Stamps of Life}


Hey there friends! I've shown you projects featuring strawberries2stamp and morestrawberries2stamp, from The Stamps of Life this month, and now I have a project featuring just the coordinating dies. (If you are a Die Hard Club member, you already have these, but if not. . .they go on sale today!) 

I diecut a bunch of strawberries and stems and adhered them together. Then I punched two small holes in the top of each one, and threaded twine through. Then I added some little twine bows between each berry. These dies are SO much fun to use, because they are quick and easy and a fun embellishment for so many summer projects! 


And here are some cute little fingers holding up my garland. (Do you know how incredibly difficult it is to photograph garland!!!??) I really love this picture though, because I love those little fingers even more than these sweet strawberries!

As you read this, I'm spending the day at the Atlanta Zoo with my family, and then we are off to the mountains in North Carolina. I'll be gone till the end of the month, but in the meantime, it's going to be looking like CHRISTMAS around my blog. (What the whaaat????! Seriously!) Come on back tomorrow, and I'll prove it! Thanks so much for stopping by! Hugs!!! xoxo

Monday, December 23, 2013

Christmas Countdown Day 5 {Sizzix}

Welcome to day 5 of my oldie-but-goodie Christmas countdown. I'm sharing one of my favorite past holiday projects each day as we count down to Christmas. 

Today's card is a Sizzix Flip-it card. I used a die to create this whole card base.  There's a great video and examples of the Flip-it dies (there are a lot of different shapes and sizes!) on The Stamps of Life website, because the amazing and talented Stephanie Barnard, who owns TSOL, also designs stamps and dies for Sizzix. 


It's so nice to mass produce cards when you have dies to do all the cutting for you! I didn't have to use scissors at all on this card, except to trim my twine! 

So seriously - it is ALMOST CHRISTMAS. for REAL. Tomorrow is Christmas Eve. If you aren't done wrapping gifts yet - do it TONIGHT. Get it done, so you aren't stressed and working at the last minute. That's MY mission anyway! 
See you tomorrow!!
xoxox

Sunday, December 22, 2013

Christmas Countdown Day 4 {The Stamps of Life}

Welcome to day 4 of my oldie-but-goodie Christmas countdown. I'm sharing one of my favorite past holiday projects each day as we count down to Christmas. 


Ahh, these cards make me so happy. In contrast to yesterday's gift bag with lots of layers, lots of busyness, lots of STUFF, these two cards are completely my style. Lots of white. Lots of bright pops of color. 


You can find all sorts of great Christmas stamps and dies at The Stamps of Life! Sometimes I think Stephanie creates stamps just for ME, because they are so easy to work with, and it's so much fun to make bright, bold, clean and simple cards with her stamps!  

Thanks so much for coming by to my Christmas countdown today! I'm happy to say my gifts wrapping is about halfway done. All long-distance packages went out on Friday, and the house is getting clean. (I told the kids that their gift to me is to help me CLEAN so I can enjoy a lovely house for Christmas!)

See you tomorrow! xoxo

Wednesday, August 28, 2013

Go-to Gal Designer Challenge {The Twinery}

The Go-to Gals are having fun with products from The Twinery today! Once a month we plan to have our own little crafty challenge, featuring some of our favorite products. Today I have a card to share with you featuring three great twines from The Twinery: Cantaloupe, Honeydew, and Shore.


This card also features stamps and dies from Technique Tuesday (Flags Are Flying), plus patterned paper from DCWV (6x6 The Basics Stack).


Please stop by The Twinery and check out all of their products (have you seen their new solid colored twine!? SWOON!) You can also find fabulous projects, challenges, and information on The Twinery Blog!


Be sure to check out what the other Go-to Gals created, with goodies from The Twinery!


If you haven't been by Paper Crafts Connection today, Heather Campbell is over there today . . .and I bet she has something fabulous to share! 

Thanks so much for stopping by!
xoxo

Saturday, May 11, 2013

i thank my lucky stars. . . {thank you cards!}

Hey there friends! I have two cards for you today, but I realized I still owe this little blog some pictures and a recap of my trip to Utah, with the Paper Crafts magazine chicks.  I'll get right on that, I promise.  The days have been whizzing by since I got home, and I've neglected the old blog. 

But right now, quickly, while the kids are happily playing with army men AND dinosaurs on the kitchen floor, let's get through these to cards, before the army men and dinos start flying across the room. 
Shall we?

First up - Hero Arts! I was so excited to dip into the funky and fun neon ink pads from Hero Arts.  The colors are so vibrant and fabulous!!!  The Year Round Sentiments, also from Hero Arts is one of those "super practical - keep using it again and again" stamp sets.  But even better than being practical. . . . it's CUTE too! 

 Next up, Lawn Fawn! I used Daphne's Closet 6x6 paper on this card, along with Quinn's ABCs dies.  There is a great accompanying stamp set too, but I used simply the dies for this - and I kind of love it! This is my FIRST set of alphabet dies, and I have a feeling they will be getting a LOT LOT LOT of use!

I created both of these cards on Brilliant White cardstock, from Discount Cardstock.  It's my go-to white cardstock. It holds ink well, and it folds nicely.  It's one of my favorites! 

Okay, my promise to you - many goofy photos from ed board in Utah. Coming soon.  
xoxo

Monday, April 29, 2013

Surprises are fun!

So today's the day! I'm off to Utah!  It's going to be a long day of traveling, from Florida to Utah. . . 5 hours on an airplane, by myself (plus a little time in airports!)  I'm not quite sure what I'll do with all that time to MYSELF. No kiddos to clean up, entertain, chase, and keep safe and accounted for.  I have some books loaded on my ipad though, and I suppose somehow I'll make it through the long trip! :)

I'd like to share some fun little projects that I made for my sweet Go-to Gals.  It's funny how you can consider someone a FRIEND, even if you've never actually MET.  It will make the hugs and giggles even more special, to finally see them all in PERSON for a few days!

So for each of the girls, I covered a mini-composition book, using some gorgeous Teresa Collins paper.  I added their initial on each one.

these first two are for kim kesti, and betsy veldman 

for teri anderson, and kimberly crawford

and for heather campbell


I put each one in a cute bag from Whisker Graphics, and added a Teresa Collins tag.  I diecut the girls initials, and clipped it together with pinwheel clips made from a clothespin and a stamp from The Stamps of Life.


To create the pinwheel clips, I covered each with a small strip of patterned paper.  Then I stamped the pinwheels on cardstock and patterned papers. I paper pieced them together, and adhered to the clip with foam tape.  These clips are SO fun to make, and you can even add a magnet to the back for extra versatility. They are great for packages, for paper clips, or bookmarks. {Love making them!}

A lot of people are hunting for teacher-appreciation gifts right about now. . .this is a quick and sweet little project you could put together for a child's teacher too! 


I hope you like them! These were fun little gifts to make for my friends.  I waited until today to show them, because hopefully they are all enjoying their plane flights and not reading my blog! Come on back on the 1st, because I have NEW goodies from The Stamps of Life to share! (It's SO SO cute!)
See ya on the flipside!
xoxo

(project goodies: mini-composition books - Dollar Tree, patterned paper and diecuts - Teresa Collins, Memories, alpha rub-ons - Close To My Heart, aqua letters - Heidi Swapp (Pink Paislee) twine - The Twinery, letter diecuts - Lawn Fawn pinwheel stamp - The Stamps of Life, bags - Whisker Graphics)

PS be sure to check out this previous post, with a chance to win a non-crafty giveaway. Non crafty?! I know - what's THAT!?

Wednesday, April 10, 2013

{the twinery} Hello!

I feel like I've been away from my blog for ages. . .busy busy busy! I spent a fabulous weekend with my BFF and her cute family . . .and because this is MY blog, I can force you to see a few funny pictures of me, my kiddos (the boys), and her kiddos (the three girls.)  We had a blast.  These kiddos have known each other since they were babies (which is proven by the fact that one of them IS a baby! ha!)


But I know you didn't come here to see me and my goofiness (heck, what do I know - maybe you DID!)

Onward to a card though. . . . have you ever gotten an order from The Twinery? Well - it comes with this SUPER CUTEY PIE ADORABLE business card, and as soon as I saw it, I thought, "I HAVE to make a CARD with this!" So I trimmed it in half - see that heart!? I mean, it was BEGGING to be used for a crafty purpose.  (And don't even get me started on the cute pink pencil in the package too!)

I embossed the pink card stock with a Sizzix embossing folder, and whipped up this card in no time. 
Whipping up cards in no time is the best way to make a card! (I have a short attention span!) 


Cute and quick! 
Thanks so much for stopping by today! 
{and super huge thanks to The Twinery for the fabulous twine!}
xoxo

Wednesday, April 3, 2013

{TSOL} ladybugs2love

I always LOVE the beginning of the month, because I can finally share the new stamps from The Stamps of Life! I have usually made samples almost a month in advance, so it feels like FOREVER before I can share the cuteness!  And as always, we have a whole bunch of CUTE to create with, in the new ladybugs2love stamp set!

On this first card, I stamped the background in gray in, and then paper-pieced the big ladybug. I popped her wings up on foam tape, and added some sparkly glitter jewels for her antennae. 


 I busted out my TSOL sprays on this second card, using the Strawberry spray (it matches the Strawberry ink pad) to add a little spotty-dottiness to this card.  And the black and white twine (from The Twinery) was the perfect finishing touch.

Okay, so this third card I created is really cute. . .and incredibly NOT EASY to photograph.  It's a tri-fold card.  I scored it on my Scor-Pal, then attached the red panels, and then used circle dies and punches to make my polkadots. 


On this second image, you can see from the top right image what it looks like when you open the first flap, and then the bottom right image is the entire inside.  I had fun with those little ladybugs! (They are tiny and adorable!!!!) 

You can find all sorts of fabulous stamps, ink, dies, and supplies at The Stamps of Life!!!! Head over, and while you're there, check out the gallery for all of the spotty-dotty samples that the design team created!

Thanks so much for coming by!!! 
xoxo

(card supplies: cardstock - Discount Cardstock, ink - Clearsnap, twine - The Twinery, circle dies - Sizzix, gray polka-dot washi tape - Close To My Heart)

Sunday, February 24, 2013

Making treasures from trash {birthday box and card}


I created the following tutorial for www.acherryontop.com.  You can find all of the supplies I used in the ACOT shop!

We have a favorite cupcake shop in town, that has such cute little take-out boxes.  I am a sucker for containers and packaging, and as I was disasembling the box to put it in the recycling bin, I started to think dangerous crafty thoughts!  I thought that surely I could use this box as a template to create my own little box.  It was a great size box because when it was opened up, it fit on a 12x12 sheet of paper.  Today I'd like to show you what I created, as well as share some inspiration and resources so that you can become a box-making master! 

In addition to basic tools, here are the supplies I used today:

This is the box that inspired my project.  It's basically like an elongated "chinese take-out box".  

Sweet By Holly treat box

My first step was to carefully disasemble the box and trace it onto paper. Then I cut the outer shape.  Using the original box as a guide, I then began to fold and score the necessary lines.  I used my Scor-Pal to help me achieve clean edges.
Think about the paper you'll use.  I chose My Mind's Eye patterned paper, which is a cardstock weight paper,  but depending on what you plan to fill your box with, you may want to use thicker weight cardstock, like 100#, for heavier treats.  (Bazzill Card Shoppe is a great heavy thickness, if your template fits on 8.5x11)

treat box tutorial by laura williams, for www.acherryontop.com

After trimming and scoring the box shape, I used the original  as a guide for gluing any edges that needed to be secured.  (I apologize for the lack of pictures of this step -sometimes I just don't have enough hands to fold, hold, secure, and photograph all at once!) 
To embellish my box, I kept it pretty simple.  I used stickers from SRM Stickers - this is my favorite sticker company! They make fabulous stickers that are so versatile and easy to use.  I especially love their collections for parties, weddings and graduations.  I  used a cheery cupcake sticker and adhered it to a diecut kraft circle.  I punched a hole in it, and tied it around my box with baker's twine from The Twinery.  Quick and simple, but perfect for birthday goodies! 

treat box tutorial by laura williams, for www.acherryontop.com

To finish off my project, I created a matching card.  I used another sticker, and another diecut circle, and then assembled my card with layers of patterned paper, cardstock, plus a sentiment and scalloped border stickers, also from SRM.  

treat box tutorial by laura williams, for www.acherryontop.com

I can totally see this box going in to my child's teacher, filled with treats - or even a small gift.  It would be great for a coworker or neighbor too! 

treat box tutorial by laura williams, for www.acherryontop.com
Now, although I was completely inspired by my garbage (giggle giggle) there are other ways to create quick and easy gift boxes even if you don't have a take-out box to disassemble.  Thanks to the internet, if you Google the words "free printable box templates" you will find more resources than you can imagine.  Trust me - you will be totally inspired.  All you have to do is print the template on cardstock, trim, and score -  or print it on paper, trim it, and use THAT as a template.  For even more ideas, check out a lot of inspirational projects in Score, Fold, Create! by Annie's Attic.
Thanks for stopping by today to see my new take on recycling! I hope you're inspired to look differently the next time you see some unique packaging, and that you'll think twice about your trash - I mean treasures!

Saturday, February 25, 2012

Happy!!!!!!

Happy to stop by and say HELLO to you today!
Happy for family portraits today with my cutie pies! 
(Thank you Steph Owens, for the magic you will make!)
Happy about TWINE from The Twinery, who so sweetly sponsored the CPS blog this past week. (Thank you thank you thank you, for feeding my obsession with twine!) 


I created this fun little Easter egg with a stamp from The {Stamps} of Life, LOTS of bling, and beautiful twine! I really sort of love it!  I was feeling sort of stumped on this week's CPS sketch, but I felt better about it when I just sort of shrunk it all down.  See?? :)


If you participated in the 5th anniversary celebration at CPS, be sure to stop by and check out the list of winners if you finished all 15 sketches! The winners are POSTED!!!!! Eeek! I hope your name is on the list! :)

Thursday, November 10, 2011

EAD November Color Challenge

{Scroll down or click HERE for The Twinery/TSOL blog hop!}


Have you seen the November color challenge over at EAD Designs! You NEED to participate, because everybody is a winner! Play along and receive a 25% off coupon... (how awesome is THAT!?) Maybe you'll be the winner and win a $20 Gift Card to the EAD Store! PLUS the winner of the color challege will be invited to be a EAD Guest DT. (just like me, this month!) The challenge runs through November 24th.  Head on over to the EAD Designs blog to link up your project!


This is my card, using Discount Cardstock, The Twinery twine, and Funky Christmas Tags Stickerz from EAD.  A sheet of these Stickerz is only $2.50, and FREE shipping.  I bet you even have time to grab them now, and use them before the challenge is up! (Although you don't HAVE to use these stickers, or even EAD products to participate! Very cool, huh!?)

Think about it! What have you got to lose!?

 (And scroll down if you haven't stopped by for The Twinery, TSOL blog hop!)

Wednesday, November 9, 2011

Christmas hopping! (TSOL and The Twinery!)

Hey there friends! I'm having a blog-hopping WEEK!!! Today we're hopping with The {Stamps} of Life, and The Twinery!  If you are starting here, head back to The Twinery blog to start at the beginning! (If you've been hopping, you should have come here from Katrina Hunt!)


I created a Christmas card to share with you today! I used TSOL's stamp set called Holly4Christmas.  This set is one of my FAVORITES.  The sentiments are sized perfectly, and the holly and ornaments are so fun to stamp and paper-piece.  I also used the stamp set called trees2build, for the branch and birdie. (Should I mention, it's another one of my all-time favorite sets!?) 
Here's how I created this card:
I stamped the branch, and then paper-pieced my ornaments from card stock.  I attached them to the card, using foam tape on the red ornament.  Then I carefully pierced holes in the card, and threaded the twine through, tying a tiny bow above each ornament. 
Clean and simple is TOTALLY who I have become, and I LOVE it.  I love the contrast of the crisp sharp lines, and circular ornaments on this card.  I hope you like it too, and I hope you'll come back to visit me again!

But NOW. . . .head on over to visit Jen Carter!

And remember. . .
As you make your way through the hop make sure you comment on each and every post. There will be 2 prize winners chosen randomly among the blogs:
One winner will win 2 stamp sets  (winners choice) valued at $12.95 -total retail value: $26.90 per prize! from The {Stamps} of Life.

One winner will win the Ultimate Color Sampler Pack ($25 value!) from The Twinery!!!
The prize winners will be announced on The {Stamps}of Life and The Twinery Blogs on Wednesday November 16th. 


Want to know more about The Twinery, and The Stamps of Life?

Our twine is made from 100% cotton, it’s eco-friendly and made in the USA. Whether you’re gift wrapping, crafting or tying up baked goods to give to a friend, our baker’s twine adds a fresh, yet nostalgic look to any project at hand! Our baker’s twine comes in 14 delicious colors and is uniquely twisted against a bright white hue, creating an eye-popping burst of color and a creative embellishment! Our twine has lots of color which lends to a fun, candy-striped look. For creative ideas & more…visit OUR BLOG!

We feature high quality, made in the USA, clear stamps and digital stamps/brushes for stampers, card makers and scrapbookers. Feel free to browse our gallery with more than 2500 samples using our stamps, watch our free how-to videos and join our club! 

Tuesday, October 18, 2011

BOO!! (TSOL, The Twinery, and Cas-ual Fridays)

I decided to MAKE the time to play along with the CAS-ual Fridays blog this week.  If it's new to you, the premise of CAS-ual Fridays is clean and SIMPLE.  (Hmm, did you know I really REALLY dig CLEAN and SIMPLE?!)  So why I haven't MADE the time to participate a long time ago, I don't know.  
This week's challenge is to create a Halloween card without a SINGLE SPECK of orange.
Fun, fun, fun!
So here, my friends, is my orange-less Halloween card.  I used stamps from The {Stamps} of Life, and twine from The Twinery.  The card stock is from Discount Cardstock (Brilliant White, and Soot) and the teal gems on my ghostie's hat are from Want2Scrap.
It is rainy and dreary here today (which I love in and of itself!) but I love it EXTRA today, because coming behind this weather is a few COOL WEATHER DAYS!!!! I even saw a 49 for the low one night!!!! (And in October in Florida, THAT my friends, is unusual!)  We are DEFINITELY going to the park after school tomorrow.  And hopefully the cool weather will make everyone want to spend lots of money at this weekend's craft fair!!!!

Friday, September 16, 2011

a little more BOO for you!

Okay, so the days are just WHIZZING by.  Seriously, how does this HAPPEN!? I looked at my blog, and thought - NO, it was not MONDAY that I blogged.  It was like - um, YESTERDAY.  But clearly, it was not.  So here I am, finally back again with a few more projects from the new TSOL Halloween stamps!
I gotta make this snappy, because I need to head out the door to get mr. first grader from school, in like, TWO MINUTES.  (Why do I finally get motivated to blog, when I DON'T have time to!?)
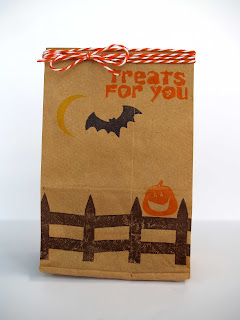
First up, a super simple treat bag - seriously, you could whip this up in like three minutes. Finish it off with some rockin' twine from The Twinery, and away you go!
 I am SO in love with embossing lately, ever since I got the Clearsnap Mix'd Media Inx. . .clear embossing powder, and these inks are a DREAM to use!!!! I used the black on both of these cards, and it gives it such a sharp crisp look.

Okay - did I do it? Did I blog in TWO MINUTES!? (It's sort of a sad excuse of a blog post, but lots of pictures will hopefully make up for my quick little ramblings!)
Have a FABULOUS weekend. . . .I sure plan to!!!!
(Especially since I just cleaned almost my WHOLE house today. . .which should last all of like ONE hour, if I'm lucky! ha!)
xoxo

Tuesday, August 16, 2011

Brrrrr. . .

it's sweltering here. august is SO hot in Florida!
seriously.
hot.
but this card makes me feel cool and crisp, and ready for WINTER.  (well, really i'm just ready for fall!)
i used brand-spankin'-new stamps from Unity Stamp Company, and fabulous Polar White Flowersoft, provided to the CPS girls for last week's sponsorship. i also used the beautiful twine from The Twinery.  (Did you know they are having an anniversary celebration!!??? check out their blog for LOTS of fun giveaways!)

We are in the final week of summer vacation here. . .so I better get back to it, before the kids climb the walls or jump off the furniture (again!) Have a TERRIFIC week!!!

xoxo

Monday, July 18, 2011

sun, sand, and palm trees

Ahhh, summer time! The July stamps from The {Stamps} of Life are perfect for summer time cards, and scrapbook layouts!  Palm trees, a relaxing hammock, sand, shells. .. . AHHH, life IS good!
Here are a few samples I created with the stamps! You can find the stamp set, Island2Visit, along with all the other TSOL stamp sets, here!

And now that I'm in the mood, we are heading to the beach this morning! 
Have a TERRIFIC week!

card goodies: all stamps from TSOL Island2Visit set, cardstock - Discount Cardstock, twine - The Twinery, ink - Close To My Heart

Thursday, July 7, 2011

twine and cardstock and prizes - OH MY!


The Twinery and DiscountCardstock.com Design Teams are joining up today for a Summer Party themed blog hop!

As you hop from blog to blog make sure and comment on every post because there will be two winners chosen randomly along the hop. If you get lost anywhere along the hop (or if someone is having a blog glitch!) a complete list of participants will be posted on The Twinery and DiscountCardStock.com blogs. The hop will end on 7/13/2011 and winners will be posted on The Twinery and DiscountCardStock.com blogs the following day.

The prizes!
Colorful Bunch Sampler Pack ($20 retail value!) from the Twinery (shown)

 A paper sampler pack (a $20 retail value!)from DiscountCardstock.com


The Twinery
Our twine is made from 100% cotton, it's eco-friendly and made in the USA. Whether you're gift wrapping, crafting or tying up baked goods to give to a friend, our baker's twine adds a fresh, yet nostalgic look to any project at hand! Our baker's twine comes in 11 delicious colors and is uniquely twisted against a bright white hue, creating an eye-popping burst of color and a creative embellishment! Our twine has lots of color which lends to a fun, candy-striped look.


DiscountCardStock.com
 DiscountCardstock.com was launched in 2002 in Salt Lake City, Utah. Our mission is to provide great quality cardstock and specialty papers at discount pricing. We offer 100% acid and lignin free, archival quality uncoated cardstocks, as well as metallic, vellum, hand-made specialty papers, envelopes, scored cards and high qualify art paper and cards that are specially coated and developed for use by professional artists and card makers using ink jet printers.

Okay, are you still with me? My project. . . .
I created a gift bag and matching card, full of summer colors and fun!  This project was quick and simple, and lots of fun to make.  I was inspired by the oh-so-popular trend of color blocking.  Have you heard of it? Go do a Google image search, or Pinterest search for it, and you'll immediately recognize it! It's hot in fashion, home decor, and of course - PAPER CRAFTING!

To create this project, whether you do it on a bag, a card, or something else, just wrap cardstock blocks (in varying sizes) with twine, and adhere to a clean white background.  (I love clean white backgrounds!)  I added some cute little tags, stamped with Unity Stamps in coordinating colors, and a big white bow on my gift bag. (This bag was just a plain white bag from Target, but think about how you can recycle a shopping bag, or solid colored packaging you have laying around!)


Thanks so VERY much for stopping by today! I hope you'll come back soon! Happy blog hopping!

Laura Williams http://www.lauralooloo.blogspot.com/  (THAT'S ME!!!) 
Angelica Suarez   http://handmadebyangelica.com/
Angie Hagist-Discount Cardstock Blog http://www.discountcardstock.com/blog/